
Introduction
Please note that dual extrusion is for advanced users. You should have some advanced knowledge on some G-Code and how to solve random issues that may arise such as filament jams.
-
-
Please refer to the following Guide == Clean Cura Slicing Software Setup ==
-
-
-
SeeMeCNC settings and slicing profiles are currently aligned to work properly with version 3.5.1. Make sure you download this version as this is what the guide is written for!
-
Problems have been reported with dual feeding and Cura 3.6.x version and newer.
-
Also note we DO NOT recommend printing over USB. Upload to the printer or use an SD card on the control screen if you purchased a control screen option.
-
Cura can be downloaded here: Cura
-
-
-
Download Machine Settings.
-
Go to our github page for which machine you are working on:
-
Artemis files
-
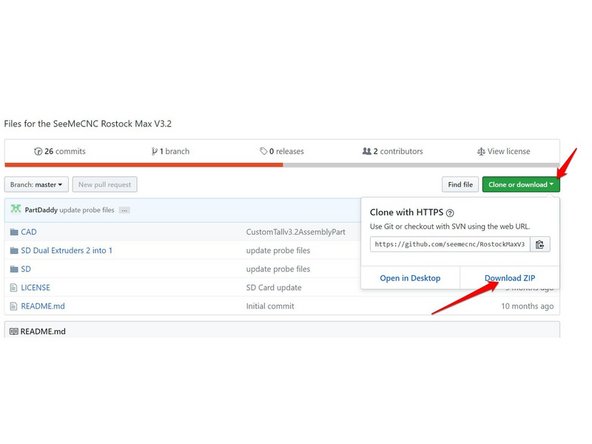
RostockMax V3.2 files
-
Click the "Clone or Download" button and select Download Zip. Save the file to your computer.
-
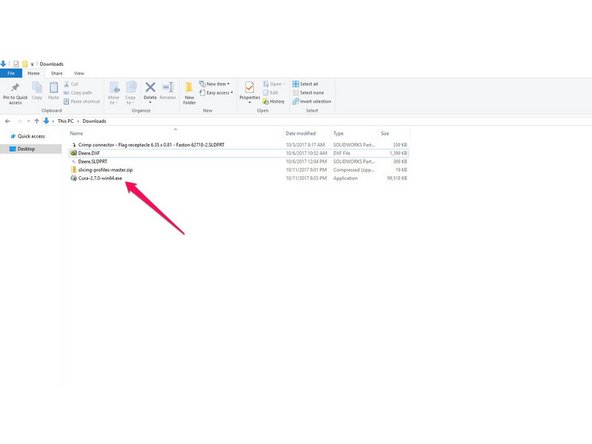
As with the previous step, Extract these files on your computer to a folder.
-
If your machine did not come with dual extrusion from the factory, Follow Steps 3-10 Here
-
If you just updated the files on the Duet, you will want to run the First Probe macro as this will have reset any calibrations your machine previously had.
-
-
-
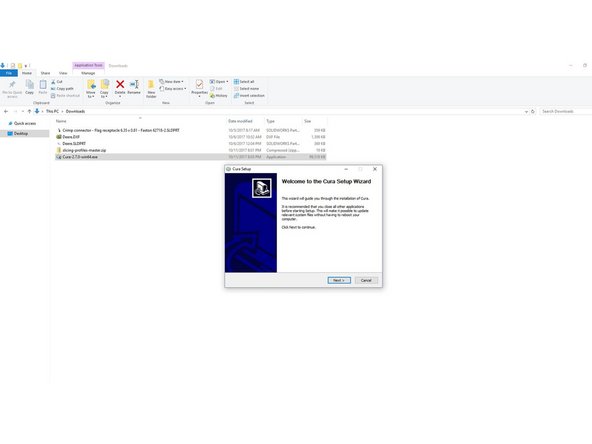
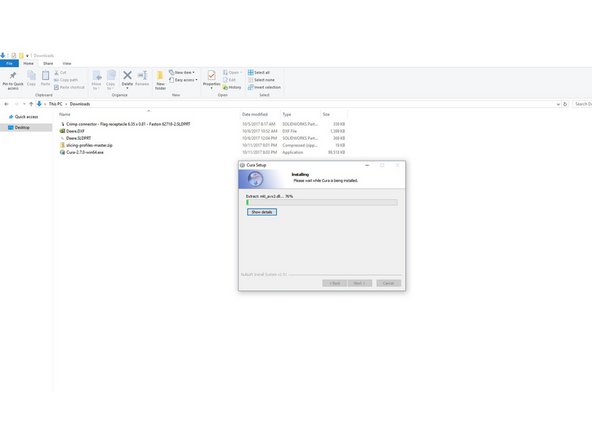
Double click on the Cura install that you downloaded.
-
Follow through the prompts to specify the installation location, file types, etc.
-
When the install is complete, click the finish button on the setup dialog, that will automatically launch Cura.
-
-
-
Download the dual extrusion project file from our github HERE
-
You will want to download only the zip file (See pic 1) from this github folder and save it to your computer.
-
Extract the zip file to a location on your computer.
-
-
-
When CURA opens you will automatically be presented with the option to add a printer. Click the X in the upper right corner of the box that pops up.
-
This will cancel the make a new printer as we will be loading the printer from the files in the previous step.
-
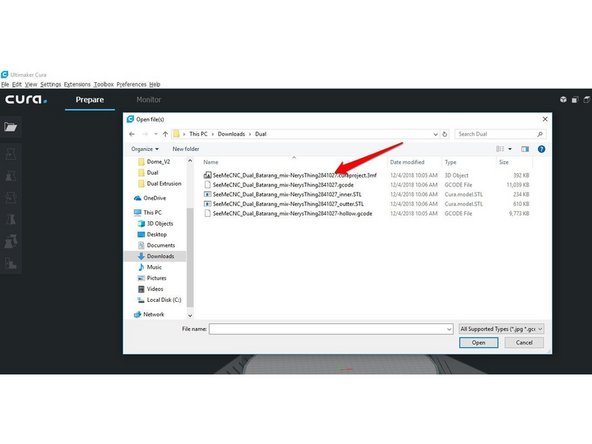
On the main screen, Click File, then Open Files.
-
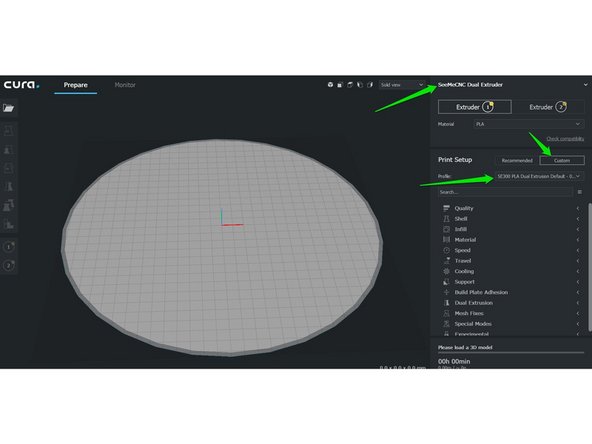
Browse to where you saved the cura project from the previous step and open the file SeeMeCNC_Dual_Batarang_mix-NerysThing2841027.curaproject.3mf (See Pic 2)
-
A summary box will pop up, click Open.
-
-
-
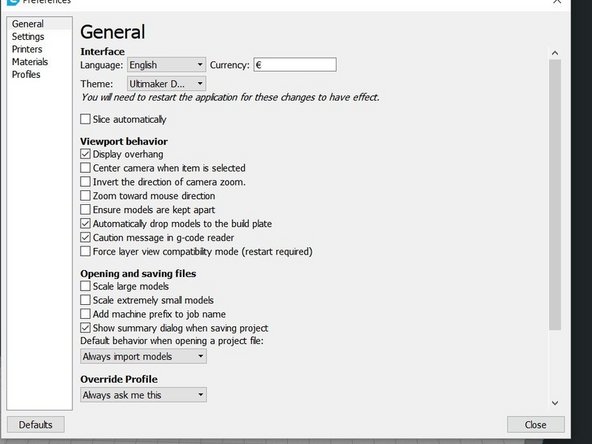
From the menu bar click Preferences and choose Configure Cura...
-
In General change the settings to match those in the first image.
-
In Preferences is where you can also go to Printers and setup different machine profiles that can be used for configurations such as different arms, nozzle sizes, etc. It is good to familiarize yourself with the tabs in preferences.
-
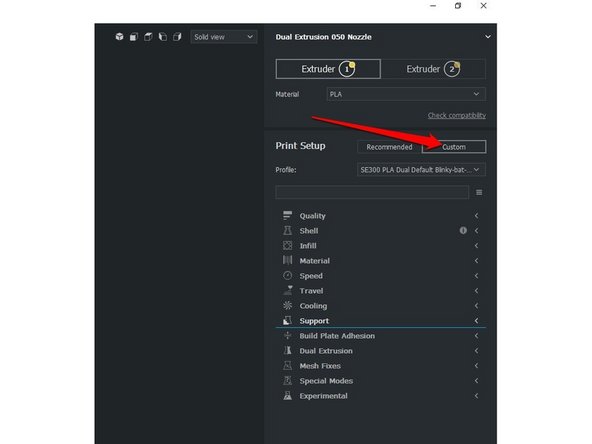
On the main cura page, you can view slicing settings in more detail by clicking the Custom button next to Print Settings (see pic 2)
-
-
-
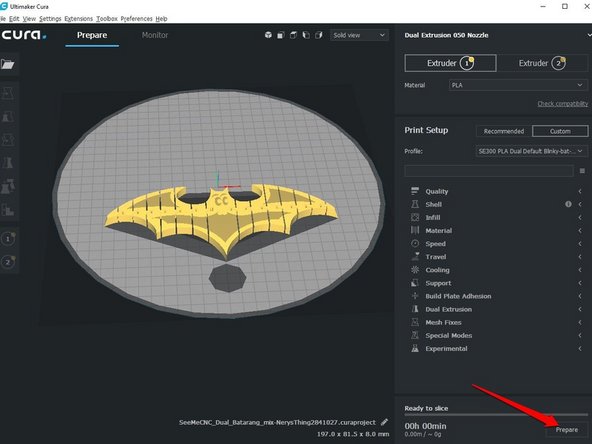
When you loaded the project file, it will have loaded all slicing settings, and a file to test print.
-
To test it with everything default, click prepare at the bottom left.
-
The prepare button will change to Save to File. Click Save to File and save the resulting gcode on your computer.
-
-
-
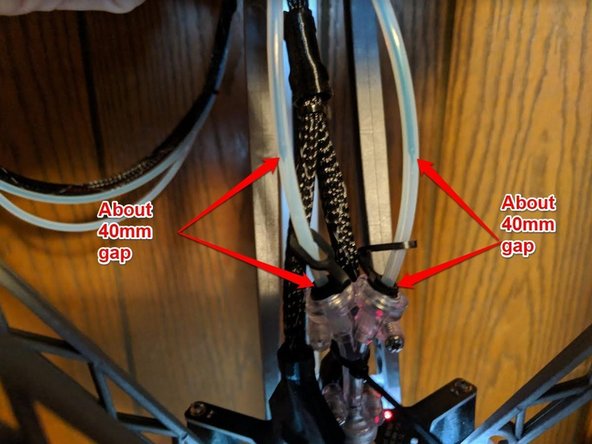
Load filament into each extruder.
-
Leave approximately a 40mm gap between the Y adapter and the end of the filament for BOTH filaments.
-
This will need to be how your filament will want to be set for each dual extrusion print.
-
Adding a bit of tape to the 40mm mark will help you the next time you set up for a dual color print.
-
-
-
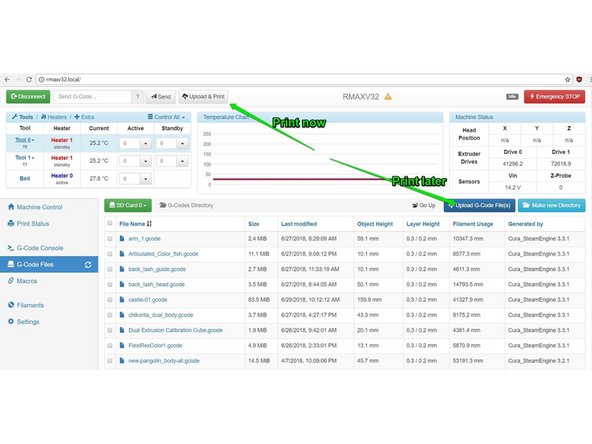
If your machine is setup for wifi and running duet web control, go to your printers page, and you have two options.
-
If you are ready to start printing now, click Upload & Print at the top of the screen and select the file you saved in the previous step. This will send the file and start the printing process right away.
-
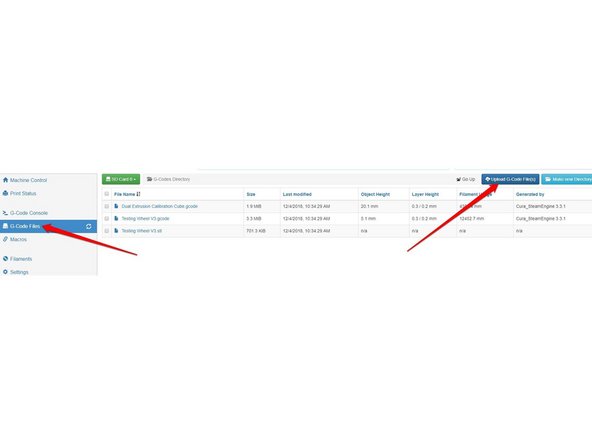
If you wish to print it later, you can click G-Code Files on the left side of the screen then click Upload G-Code Files on the right below the voltage reading.
-
If you are running on the LCD touch screen, copy the saved gcode file to a SD card. Insert the SD card in the machine and touch the icon for the SD card.
-
The default gcode files listed will be for the card installed in the duet and not the card inserted into the LCD. You will click the top left button to change what SD card is accessed. This button will change between the card in the Duet and the card in the LCD. Click the file you saved and select Print to start the print.
-
The files listed when on the file list of the LCD labeled "Files on card 0" are the files on the SD in the Duet board. The files labeled as "Files on card 1" are the files on the SD card inserted into the LCD itself.
-
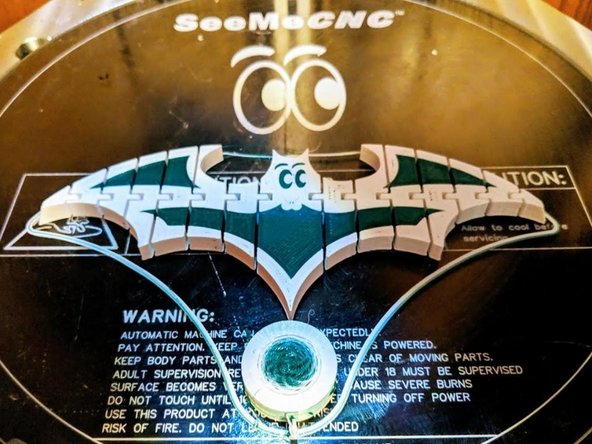
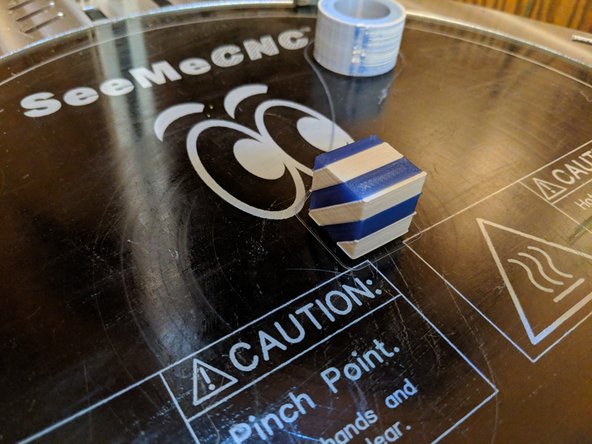
The results of the print should look similar to what is shown in Picture 3.
-
-
-
Once you have completed the initial test print, the rest of this guide will give you information on loading a dual extrusion model, how the purge tower can be moved, and how settings work in Cura.
-
The Tools along the left edge of the screen are used for importing and editing your model (scale, orientation, etc)
-
Experiment around with importing an STL file and manipulating it in the build environment.
-
Right click and hold to rotate/orbit, Middle click and hold to pan, middle scroll wheel to zoom.
-
When the model is yellow it fits in the build area and can be printed. If the model is grey, it does NOT fit. Red areas on your model are overhang areas.
-
-
-
Dual extrusion models tend to come in 2 STL files, one for each extruder.
-
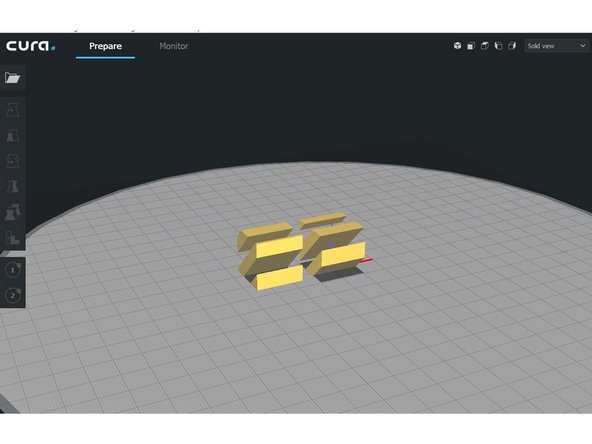
For this example, I will be loading a calibration cube. Thingiverse item 2071237 It consists of 2 files "20mm_Cube_A.stl" and "20mm_Cube_B.stl" We will load both files.
-
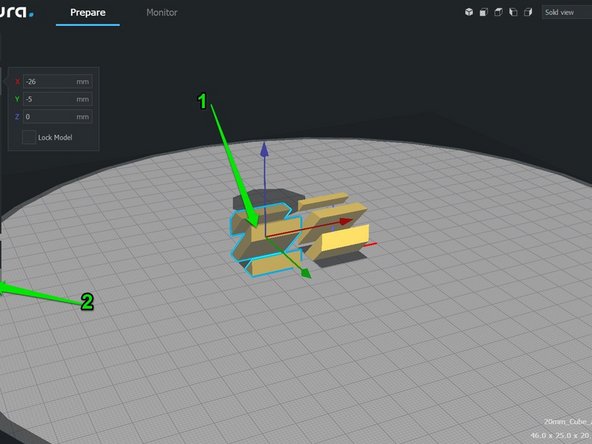
When loaded, both items will be assigned to the main extruder (Ext 0). We will click on the part you want to be the second color and click the circle with the 2 on the left. This will make that model slightly darker color indicating it is for the second extrduer.
-
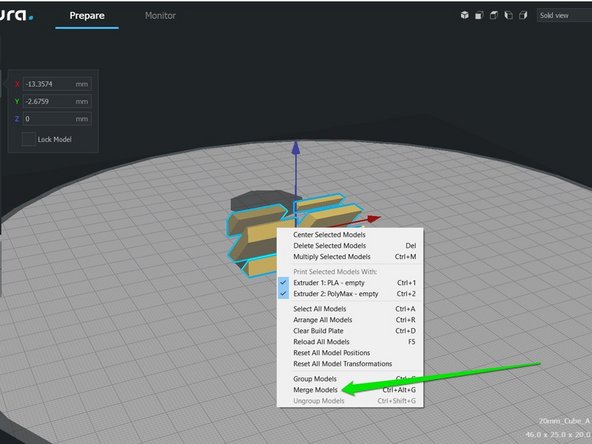
Now select both models (hold shift and click each model. Once both are selected right click the model, and select Merge.
-
-
-
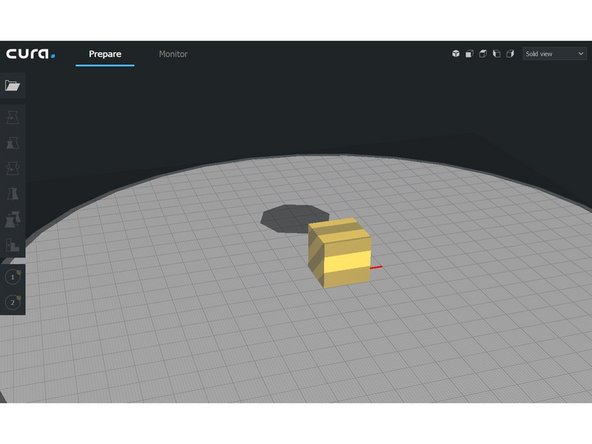
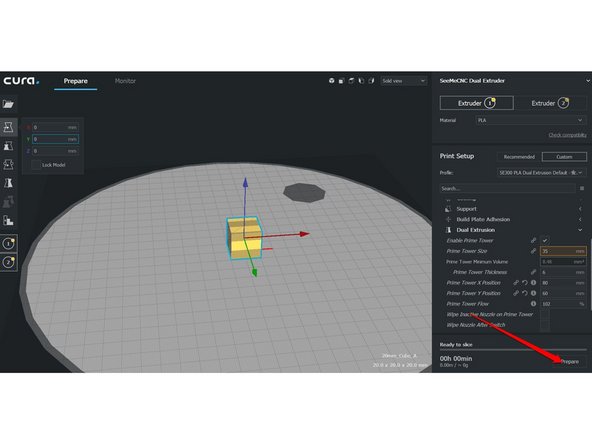
After the models have merged, right click on the model once again and select Center Selected Model. This will place the model in the middle of the build plate.
-
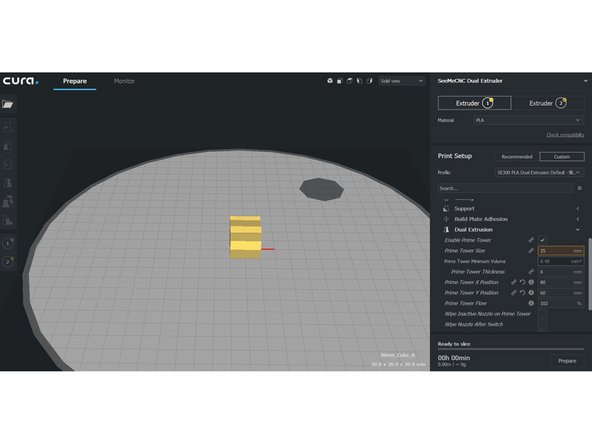
You will notice a shadow circle somewhere on the bed. This is the prime tower. You may need to locate it in a position that is away from your model. This is located in the settings on the right. Click Dual Extrusion to expand it. You can use Prime Tower X Position and Prime Tower Y Position to move its location.
-
You will need to change the position to be the same for BOTH extruders! On the upper right you will want the settings identical for Extruder 1 and Extruder 2. So if you change one, change the other!
-
In the third picture you can see I moved the prime tower to X position 80, Y position 60 to put the prime tower to the rear right corner of the print area. Depending on your model, you will need to move this away from your print model.
-
-
-
When you are ready to print click Prepare in the bottom right hand corner. It is recommended that you first check the layer/slice preview. This is located in a drop down near the top of the screen. Change from Solid View to Layer View You can use the slider to preview the slice prior to printing.
-
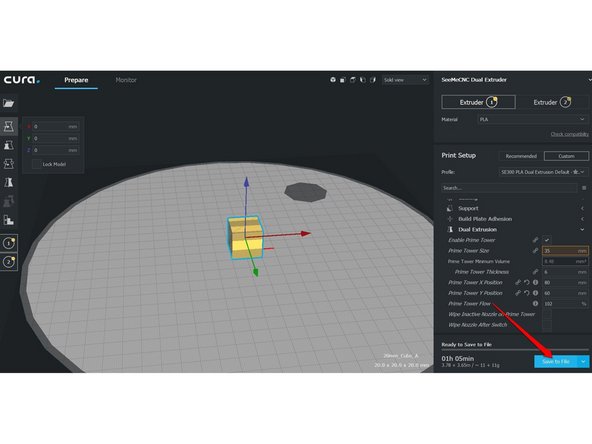
When you are ready to print click the Save to File or Save to Removable Drive button in the bottom right hand corner. If you print via a Raspberry Pi (OctoPrint / AstroPrint) choose Save to File. You can then choose where to save the file and later transfer it.
-
After you have saved the file, Cura will provide you with the file location, name, and the option to eject the memory device.
-
-
-
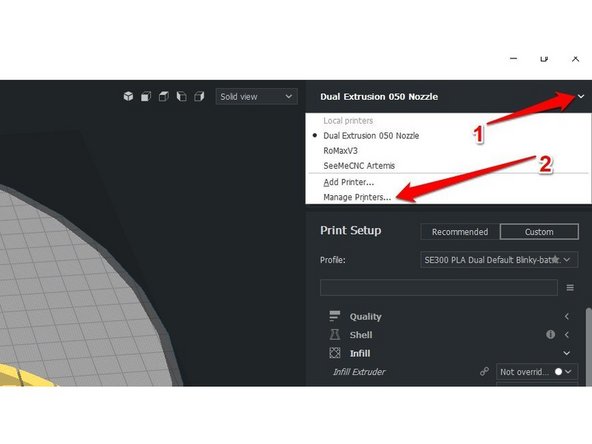
If you change the location of the prime tower, you may want to change the location of the filament swap to be near the prime tower so the hotend moves away from the part to swap the filament.
-
Click the arrow next to the printer name. Then click Manage Printers. (Pic 1)
-
Click machine settings button in the settings box that pops up to go into that machines info.
-
Click Extruder 1 and look at the Extruder Start and End Gcode boxes.
-
The first line will be the travel location for the filament swap. With the default setup of the machine if you followed the beginning of this guide, it will be at the front of the bed (X0, Y-130).
-
If you move the prime tower, you will want to also put the filament swap near that location as well. Keep in mind the center of the machine is 0,0. Positive values to X will go to the right of the bed, negative values to the left. For Y axis positive values will go toward the rear of the bed, negative values will go towards the front of the bed.
-
-
-
If using a machine with Rambo Electroincs, copy the created gcode file from cura to the SD card and insert it into the LCD screen and print as normal.
-
If using Duet, you can now connect to the Duet Web Interface, and either upload the file in the G-Code Files tab, or click Upload & Print at the top and select the file you created from cura to begin the printing process.
-
-
-
Your print should look similar to this. You can see the prime tower is placed back in the corner where I moved it in the previous step, and the item is centered.
-
You are now finished and can start diving into the world of dual extrusion! Good luck and enjoy!
-


Cancel: I did not complete this guide.
2 other people completed this guide.