
Difficulty
Very easy
Steps
8
Time Required
- EZR Struder 8 steps

User-Contributed Guide
This guide is not managed by the site's staff.
Quiz
0
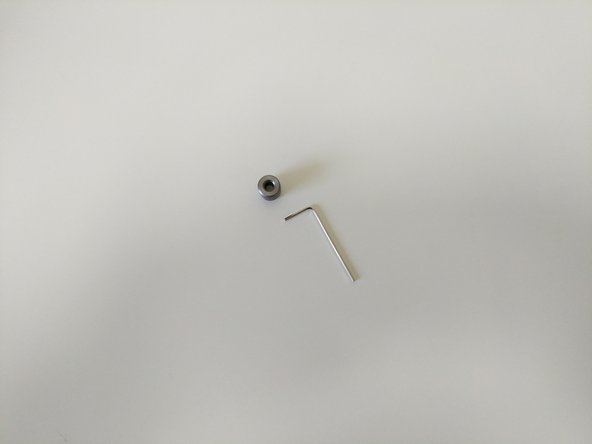
Tools
Parts
No parts specified.
-
-
This animation highlight the assembly / installation of the EZR Struder.
-
Your EZR Struder will come nearly fully assembled from SeeMeCNC.
-
-
-
-
Locate the EZR Struder pack from your kit or order.
-
If you are assembling a printer kit, you will also need to locate the bank of stepper motors packaged in bubble wrap. You will need (1) stepper motor for the EZR Struder assembly.
-
If you are upgrading your extruder on a machine you will need to remove the old extruder from the stepper motor.
-
-
-
The main bodies of the EZR Struder have been zip tied together so they stay together during shipping. You will need to cut that zip tie and remove it.
-
Keep the EZR Struder assembled
This is not accurate anymore. I just received my EZR Struder and there was no zip tie, the spring was in the bag with the hardware and the knob and there was a small piece of paper with text too small to read with two pictures on the other side crudely depicting how to assemble the spring and the two halves of the extruder body.
Aapo Saaristo - Resolved on Release Reply
Okay, so don’t remove the zip tie and then press that red button thingy… Just say’in.
Dieter Weik - Resolved on Release Reply
-
-
-
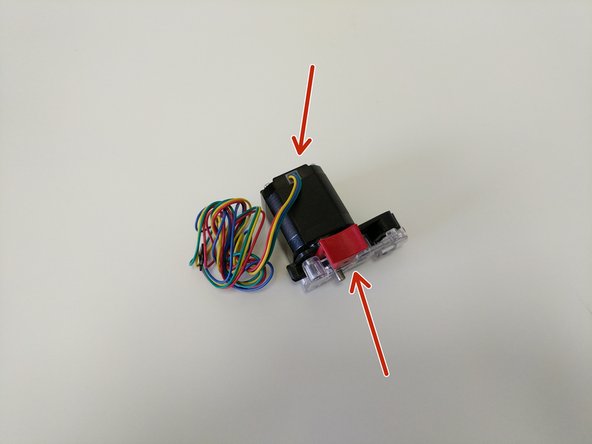
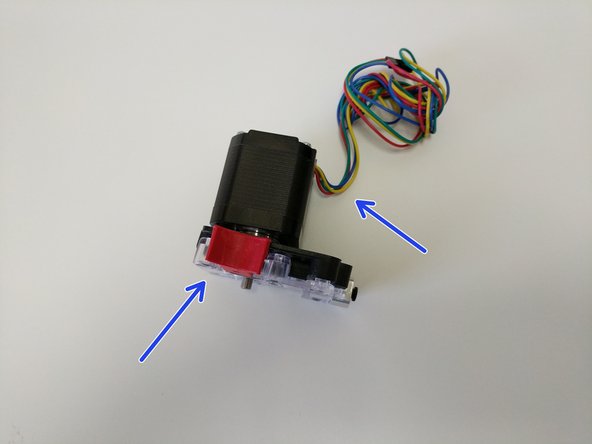
The orientation of the EZR Struder with the stepper motor is different for different machines.
-
The image with the red arrows shows the correct oriantaiton when installing the EZR Struder on the H2.
-
The image with the blue arrows shows the correct oriantaiton when installing the EZR Struder on the Rostock Max v3.
A picture looking from the direction of the motor shaft would be helpful to show where the shaft protrudes through, and which holes are used for mounting the motor.
Steve Hansel - Resolved on Release Reply
-
-
-
You will be attaching the EZR Struder to the stepper motor using (4) M3 x 10mm screws in the locations indictaed by blue arrows.
-
Fully tighten the screws
-
-
-
Locate the Hobbed Drive Roller.
-
Slide the hobbed drive roller onto the stepper motor shaft. Note the orientation of the hobbed drive roller shown in the second image.
-
Press the red release lever and slide the hobbed drive roller down into the EZR Struder assembly until the midpoint of the hobbed portion is aligned with the split between the base and cover pieces (indicated by a green arrow)
-
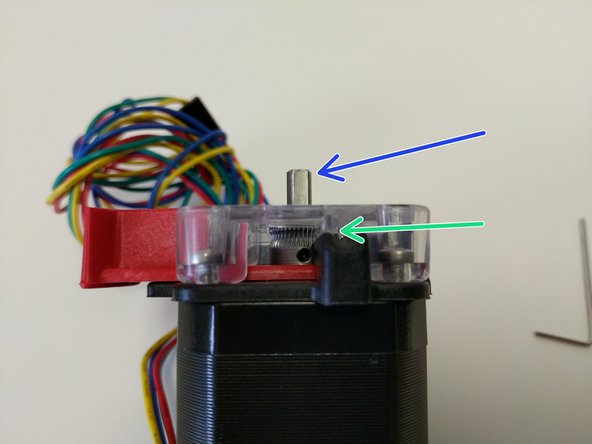
Rotate the stepper motor shaft so the flat is in the orientation indicated by the blue arrow.
-
Align the hobbed drive roller so that the set screw will be set against the flat in the stepper motor shaft.
Pro Tip: Feeding some filament through the EZR Struder and then tightening the set screw will help align the hobbed drive roller at the right position.
Christopher Elledge - Resolved on Release Reply
-
-
-
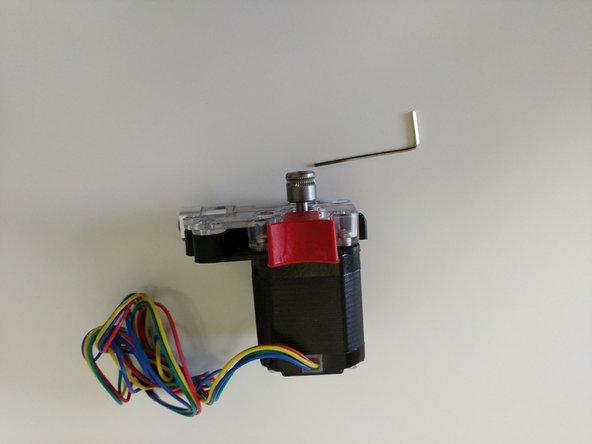
Install the stepper motor handwheel by aligning the flat of the molded handwheel with the flat of the stepper motor shaft and pressing down until it bottoms out.
-
The stepper motor handwheel is used for manually advancing / retracting filament.
-
If this is going to be installed in a new build install the (2) 6-32 x 1" machine screws and lock-nuts in the remaining 2 holes in the EZR Struder plates and hand tighten only
-
HAND-TIGHTEN ONLY. These are being placed here for safekeeping only.
-
If you are upgrading a printer and ready to install, you will now install the EZR Struder using the (2) 6-32 x 1" machine screws and Nylon lock-nuts to mount your EZR Struder into you extruder mount.
-
The black lanyard clips are installed once the bowden tube is installed in the EZR Struder. We send plenty of extra in case you ever lose one.
-


Cancel: I did not complete this guide.
29 other people completed this guide.
Attached Documents

15 Comments
Did not work for my Ender 3, The filament I am using is a flexible filament from 3D Solutech 1.75mm Real White. It would work for about 100mm or so, then the extruder sounds like it is jammed. I should have gone with a direct drive unit. I love the design of this EZR Struder. No hassle loading the filament anymore.
David Harrold - Resolved on Release Reply
how exactly do we get the spring in? i ordered 2 of the EZR Extruder and both came with a piece of paper that a pear to show that the spring is supposed to be inserted in the red plunger and then the clear cover piece is supposed to seat back over it the problem with this is theres no cut out for the spring on either which leads me to believe the spring is meant to be compressed between the housing cover and the inside of the red plunger however there is not nearly enough leway to allow this to be done without the housing top sitting crooked and when you go to set it right the spring pops out and then your back to square 1. Not a very good product design in terms of the plunger there had to be a easier way of setting up a spring ? Am i just trying to install it wrong?
Is there a cad file available for this? I understand if not.
Travis Petty - Resolved on Release Reply
This worked awesome on the Ender 3. Now even my wife can feed the filament into it! Still hits the bowden tube once in a while but a little jiggle and its through. The only thing I was not impressed with was the knob. It really didn’t feel that robust so I put the old one I had back on. Otherwise the extruder itself was totally solid and I would recommend to anyone. Knobs are not important. :)
Robert Mech - Resolved on Release Reply
Ok so we have to go to someone else in order to see how the product gets installed that is amazing - lol great customer service fellas product seems awesome but when you do stuff like that it brings down the product and it doesn’t matter how great it is because thats what the customer remembers and talks about to others. That being said do we need to change anything in our splicer settings? Don’t know? nothing included to even hint that something might need to be changed. I use simplify3D please let me know I have a project I what to start and want to know if anything needs to be turned off like retraction before I start printing with Flexible Filament.
Easy build. A tip i found here helps a great deal. Insert some filament to seat the drive roller, then tighten the grub screw.
spottyshowers - Resolved on Release Reply
Is the EZR+Struder ok to fit Creality CR-10? Do you ship to UK?
Brian Weedon - Resolved on Release Reply
Hey Brian,
you may want to check out Chuck Hellebuyck's Youtube. He just fitted this extruder on a Ender 3, wich is similar to the CR-10. https://www.youtube.com/watch?v=1GNDxvxp...
I’ve ordered one the other for day 14$ shipping via USPS to Switzerland. If you don’t find the USPS shipping option, get in touch with them by email and they will make that option available for you.
you are missing the beginning and the end to the instructions? you guys make like 4 different 3d printers and couldn't make a video upgrading each one? Im sure the product works great but the information on how to actually upgrade or use it is terrible
David Tapp - Resolved on Release Reply
Why are there no instructions on removing the "EzStruder" simply telling to do it is ludicrous. I bought the machine whole. I don't know all of the parts for everything...
...Couldn't you at least make a 5 minute YouTube video?
Jay Johnson - Resolved on Release Reply
We meet again... Good job being careful to build right. I suspect many problems members come in to 3DPC 3D Printing Club are related to the build. Things affected by a poor or wrong build, one may never know. Quietness, operation, life of parts and print quality. I'm not even going to talk about poor electronics, scary. Reminds me to mention. No matter how high quality your rig is, please install a smoke detector close to your work area and keep everyone safe. Back to the build. High Five! ^5