
Difficulty
Moderate
Steps
5
Time Required

User-Contributed Guide
This guide is not managed by the site's staff.
Quiz
0
-
-
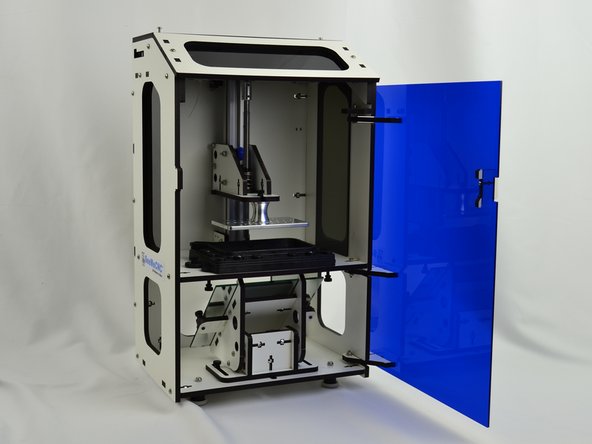
When you receive your Droplit v2 it will come in a single box with all of the machine components inside.
-
Upon opening the box you will find packaging material to protect the parts. Remove this packaging material.
-
At the top of the box will be the Acrylic Panels, and laser cut melamine. Remove these items from the box.
-
Next you will find another smaller box. This contains the hardware packs and miscellaneous components for building the kit.
-
Do a quick inventory of the parts. Each section of the builds hardware is packaged separately. You will find packing list for each sub-section in their respective bag of hardware.
-
NOTE: The Electronics Parts and Hardware pack have some larger components that have been placed loosely in the box.
-
-
-
The Melamine parts are covered with a special cutting mask that prevents the laser cutting operation from depositing cutting byproducts on the Melamine surface.
-
You have two basic options:
-
Remove all the masking from all the parts now.
-
Remove the masking from the parts as they are used in the build.
-
-
-
Locate the #10-32, 5/8” Socket Head Cap Screw in the Hardware Pack 78890.
-
View the document "Tapping Melamine" in the list of files at the beginning of this guide for a detail drawing of which holes need to be tapped.
-
We're going to use this to cut threads into 4 of the melamine plates. These threaded holes will be used later with nylon thumbscrews to hold the mirror mount, mirror, and VAT. You'll need a 5/32” Allen wrench to drive the screw in, or you can use an electric drill (depending on your level of skill / confidence).
-
MANUALLY DRIVE THE SCREW COMPLETELY THROUGH THE MELAMINE AND THEN REMOVE IT AND REPEAT FOR EACH HOLE. THERE ARE 9 TOTAL LOCATIONS TO BE TAPPED. BE SURE TO TAP THE HOLES AS STRAIGHT AS POSSIBLE.
-
-
-
-
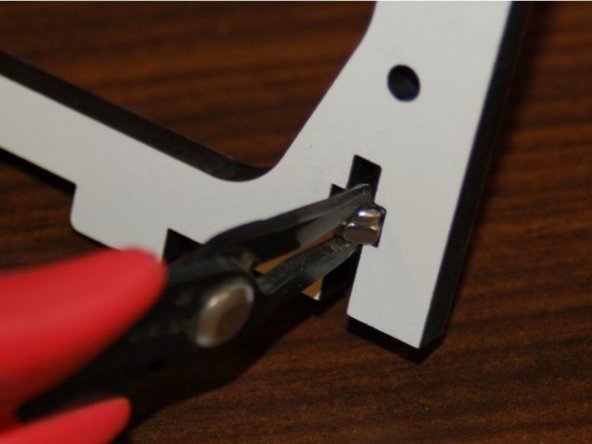
The most common joining method used in our kits is with a 6-32 x 1" Pan Head Machine Screw with 6-32 Nylon Lock Nut.
-
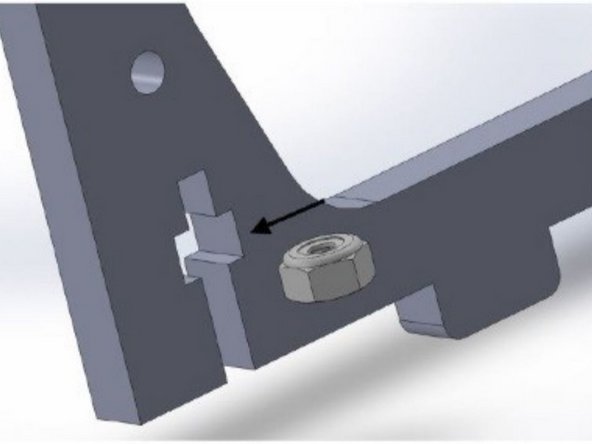
Anytime that you see the cross like shape (left-hand image) you are going to assume that the 6-32 Nylon Lock Nut (or in 4 locations: 2-56 finish nuts)will be inserted. This will help cut back on some of the text in the document, which is a win for everyone!
-
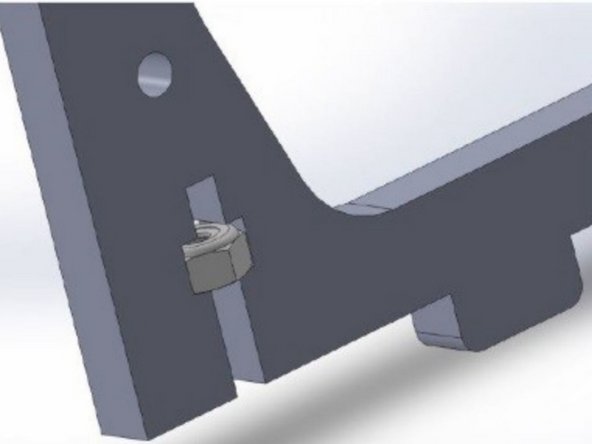
As you can see, the nut is oriented such that the flat sides of the nut fit into the laser cut pocket. The laser cut pockets are designed to be a very snug fit.
-
However, sometimes the pockets may feel a bit too tight. If this is the case, try inserting the nut in from the other face. It may be easier due to the slight bevel the cut has in it due to the laser focus.
-
You may also run into a situation where the nut pocket doesn't hold the nut tightly enough to keep it from falling out. In that case, you should use a small bit of tape to hold the nut in place until there's a screw driven into it.
-
The simplest way to install the lock nuts is to use a pair of needle nosed pliers and grip the nut as shown on the left
-
-
-
Now that we have inventoried all the parts, decided what to do about de-masking the melamine, and tapped the holes in the melamine, lets get started with the build!
-
There are 5 total sections for the build. You should build the Droplit v2 in this order:
-
Droplit v2 Carriage Assembly
-
Droplit v2 Mirror Mount Assembly
-
Droplit v2 Injection Molded Vat Assembly
-
Droplit v2 Frame Assembly
-
Droplit v2 Installing Firmware / Software
-


Attached Documents
