
Difficulty
Easy
Steps
8
Time Required

User-Contributed Guide
This guide is not managed by the site's staff.
Quiz
0
-
-
DO NOT USE THIS GUIDE if you have a DUET controlled SeeMeCNC 3D Printer.
-
Quick Start for all SeeMeCNC printers is now a link on our website menu item SUPPORT > Quick Start
-
-
-
Open MatterControl and click the "Printers..." button and then click on the Add New Printer button.
-
You'll be presented with a Setup Wizard that will allow you to enter the Make & Model of the printer you're adding. In this case, you'll chose the one that best describes your printer.
-
Note that if you're using the SeeMeCNC branded version of MatterControl, SeeMeCNC will be the only Make available.
-
If you have an H2 printer, it has not yet been added to MatterControl as an option. Choose Orion instead. You will need to change the bed size in the Printer > Print Area settings of MatterControl.
-
For the 178mm arms your bed size is: 140 x 140
-
For the 290mm arms your bed size is: 200 x 200
-
The next page of the Setup Wizard will ask to install a Communications Driver. If you installed one during the MatterControl install process, you don't need to install a driver here. For Mac & Linux users, no driver is required.
-
-
-
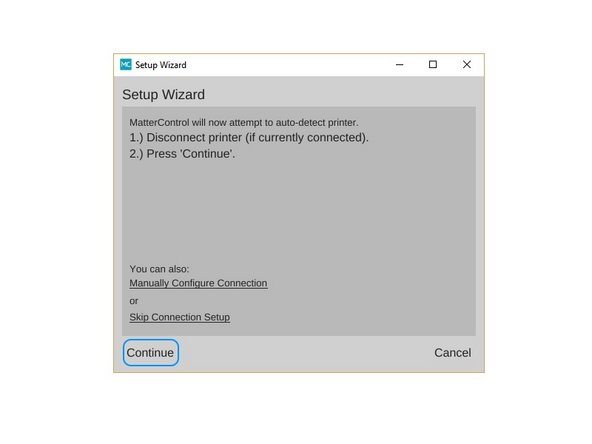
The next Setup Wizard page will instruct you to disconnect your printer to allow it to detect what port it's attached to.
-
Once the Setup Wizard has detect the port your printer is connected to, you can click the Connect button in order to complete the configuration process.
-
-
-
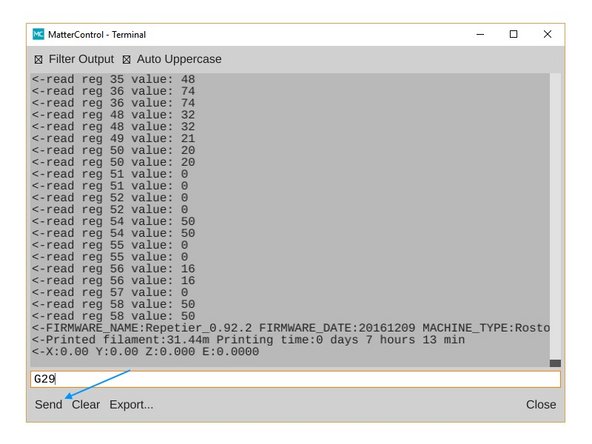
The next task is to perform the initial calibration of the printer. This is done by sending a "G29" command to the Rostock MAX v3.
-
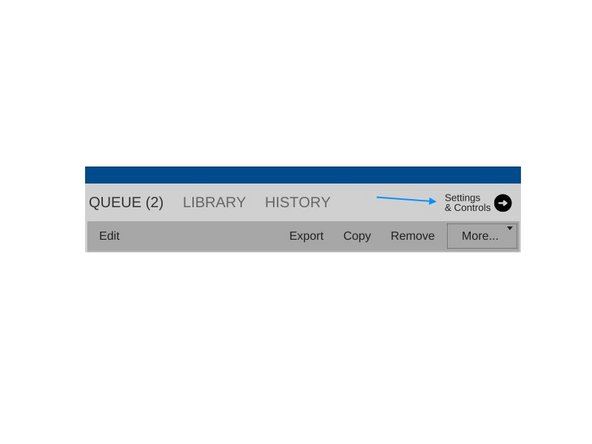
Click on the Settings & Controls button as indicated.
-
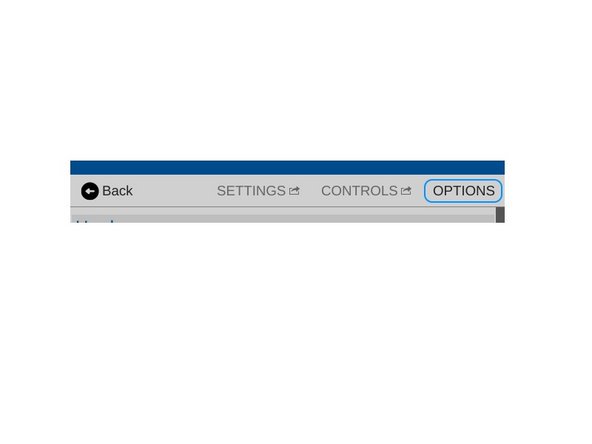
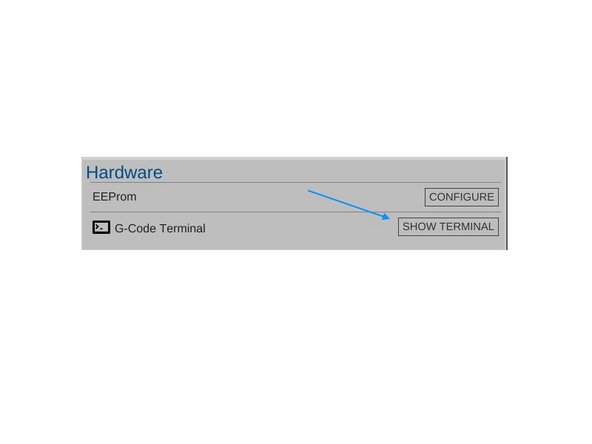
Click on the Options button and then click on the Show Terminal button. This will open up a serial terminal that you'll use to talk to your Rostock MAX v3.
-
-
-
Once the Serial Terminal window is open, type G29 into the input line as indicated and press Enter, or click the Send button.
-
Sending G29 starts off the built-in calibration process that is needed to get the Rostock MAX v3 to a state where a more accurate calibration can be performed.
-
-
-
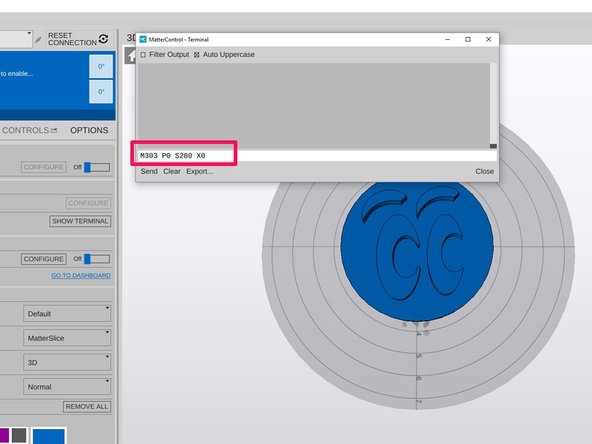
Next you need to PID Tune your hot end. This will ensure that the algorithm that controls the power to the heating element is working at optimal performance.
-
Send the following command via the terminal: M303 P0 S235 X0
-
After you have run the PID tune via MatterControl you should disconnect from MatterControl and then re-connect before performing any further operations.
-
Auto-Tuning is an iterative process, so run the routine again via the terminal, sending: M303 P0 S235 X0
-
Full explanation: M303 is the instruction to start the Autotune Process, P0 instructs it to perform the test for the hotend, S235 sets the temperature to run the test to, and X0 is the instruction to save the results to EEPROM.
-
If you plan to print high temperature materials you should run a PID Auto-Tune at a higher temperature at the target temp that you plan to be printing at.
-
-
-
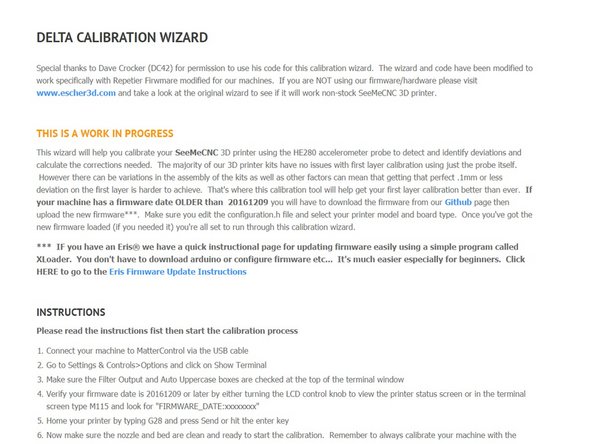
If your first layer is not as level as you wish you can run an advanced calibration. To do this, you'll need to open a web browser to SeeMeCNC's Delta Calibration Wizard. This web site will guide you through the remaining steps required to finish the calibration of your SeeMeCNC Delta 3D Printer!
-
-
-
Now that the printer is assembled and calibrated, it is time to get better acquainted with MatterControl and running your first prints.
-
Here is the Getting Started User Manual
-


Cancel: I did not complete this guide.
21 other people completed this guide.
8 Comments
ive checked my wiring several times now and everything is connected well. there seems to be an issue with my Y axis it moves to about the half way point on the tower and does not rise again during calibration it will hit the bottom of the tower and try to go farther.
Robert Walker - Resolved on Release Reply
I have done both the G29 calibration and the escher one a number of times. I am having trouble printing some test patterns such as this https://www.thingiverse.com/thing:123944... . When I try to print it the print head smacks the build plate and then rises several cm as it travels towards the z tower which it then hangs up on. Printing smaller things like rpi cases in the centre of the plate work ok with the first layer being noticeably thin at the front. I have also seen some accelerometer errors while doing the escher calibration.
Neil James - Resolved on Release Reply
Karl, what printer are you working with? When the nozzle smacks the bed like that, you shouldn’t ever just let it keep going - you could damage the belts or other components.
You may have a wiring issue with one ore more of your stepper motors - make sure that the connectors are fully seated and that the pins are fully seated in the connector shell.
geneb -
What causes the hot end assembly to crash like that? On my MAX 3 it not only crashes on the plate, but against the side rail too.