
Difficulty
Moderate
Steps
5
Time Required

User-Contributed Guide
This guide is not managed by the site's staff.
Quiz
0
Introduction
This guide only applies to SeeMeCNC printers using RAMBo control boards. This guide do not apply to SeeMeCNC 3D printers running Duet controls boards.
Printing via the SD card reader on your printer is a much more stable solution compared to printing via the USB connection. It is highly recommend to utilize the Sd card for printing especially for prints lasting many hours. If your computer is not equipped with an SD card reader, it is highly recommended that you purchase one and utilize it for printing.
-
-
Prior to exporting your GCODE file to an SD card for printing you should import your part into the slicing program, position and/or scale the part, and set the slice settings that you plan to use for the print.
-
It is also highly reccomended to preview the "Layer View" or slice generation prior to printing. This can help you catch issues before actually printing a parts, saving time and filament.
-
The following steps highlight exporting .gcode files to an SD card from MatterControl, Cura, and Slicer. The final step provides instruction for inserting the SD card into the printer and starting the print.
-
-
-
In MatterControl, to export GCODE files, the process is pretty simple, just follow this operation
-
Click "Export" at the bottom of the preview window
-
In the file export options dialog box that appears, choose the option: Export as G-Code
-
Navigate to the drive that is the SD card in the File Explorer dialog box
-
Name the file and select Save
-
You can now eject the SD card from the drive and insert it into your printer on the left-hand side of the LCD controller.
-
-
-
In CURA, to export GCODE files, the process is very simple
-
Click the "Save to Removable Drive" button in the bottom right hand corner of the screen.
-
When the save has completed, a confirmation will appear at the bottom center of your screen. You can click the "Eject" button to safely eject the SD card from your computer.
-
You can now eject the SD card from the drive and insert it into your printer on the left-hand side of the LCD controller.
-
-
-
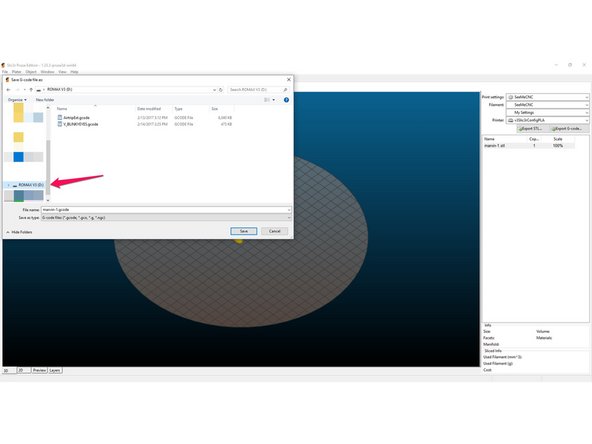
In Slic3r, to export GCODE files, the process is pretty simple, just follow this operation
-
Click "Export G-code..." at the upper right of the screen.
-
Navigate to the drive that is the SD card in the File Explorer dialog box
-
Name the file and select Save
-
You can now eject the SD card from the drive and insert it into your printer on the left-hand side of the LCD controller.
-
-
-
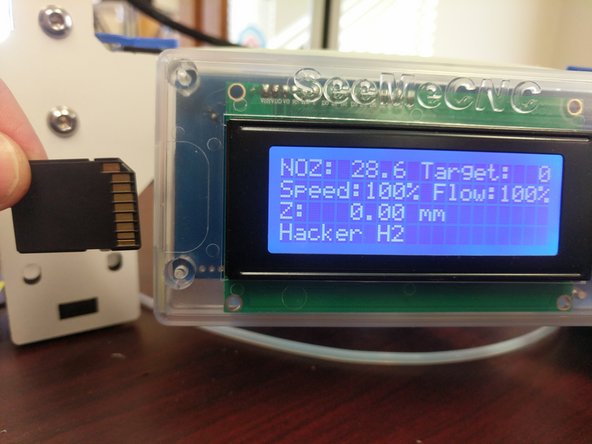
All SeeMeCNC Printers utilize the same LCD screen. The SD card is inserted on the left-hand side of the controller. When inserting the SD card, the gold contacts should be facing towards you (as shown in the first image).
-
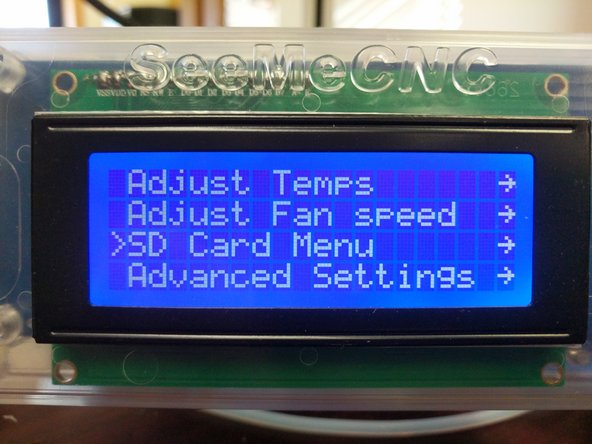
Once you have inserted the SD card into the SD card reader the printer will automatically recognize its presence and show you a list of all the files on the card.
-
You can use the encoder to navigate to and select the file that you wish to print.
-
Once you have selected a print file, the print will not begin until the target temperatures have been reached. NOTE: Some slicing engines heat both bed and hot end at the same time, other heat the bed first and then the hot end.
-
Only .GCODE files can be printed from the SD card. You can not send .STL files directly to the printer. They must be processed through a slicing engine first.
-


Cancel: I did not complete this guide.
3 other people completed this guide.
