
Tools
Parts
No parts specified.
-
-
This update installs version 2.02RTOS, factory stable since 2018. This firmware operates SeeMeCNC printers consistently and reliably.
-
Newer firmware service bulletins available >CLICK HERE <
-
IF YOU PURCHASED FULLY ASSEMBLED SEEMECNC PRINTER, DO NOT install new firmware, your printer is ready to use. PLEASE RETURN to the Quick Start Page of our website under the menu item SUPPORT > Quick Start
-
Factory supported Firmware Updates for SeeMeCNC printers are only available for download from SeeMeCNC. All other locations on the internets can not be supported by the factory due to the complicated nature of configuring the 3D printers.
-
-
-
Firmware updates for your SeeMeCNC printer should only be downloaded as instructed. Improper use of this information may result in personal injury or property damage. SeeMeCNC is not responsible for injury or damage of any kind, including death, by using our website and related information. USE AT YOUR OWN RISK.
-
SeeMeCNC tests current firmware downloaded ONLY from our repository. This ensures our products operate properly.
-
The following steps in this guide will provide instruction how to download these control files from the SeeMeCNC github repository.
-
-
-
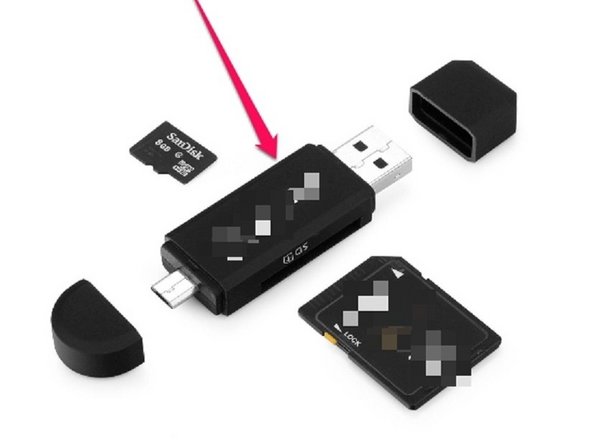
You will need a micro SD to USB adapter to complete this update.
-
An example is shown. They come in many varieties. They need to accommodate a micro SD card.
-
-
-
Select firmware below by clicking on the name of your machine. The download begins immediately. The firmware will be the most recent SeeMeCNC approved firmware for your machine.
-
-
-
-
-
-
-
turn off power to your printer
-
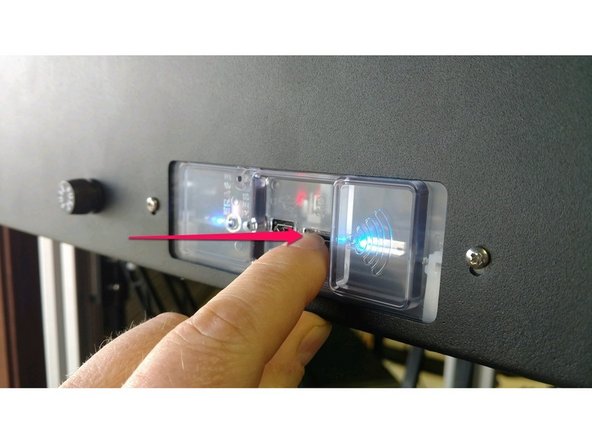
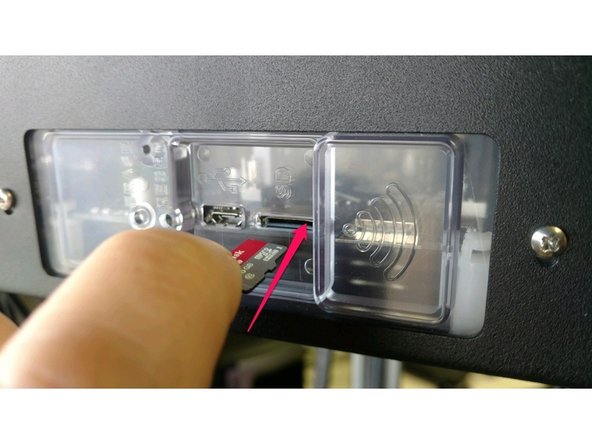
Push-in to release the micro SD card. In the picture, our fingernail was used to push in to release the micro SD card. It will spring out once released.
-
-
-
insert the micro SD in your computer
-
Warning: Back up the files in the gcodes directory. They will be permanently deleted.
-
Delete all files on the micro SD card
-
-
-
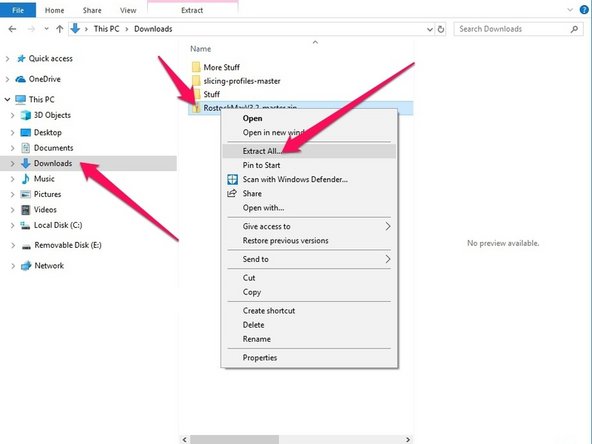
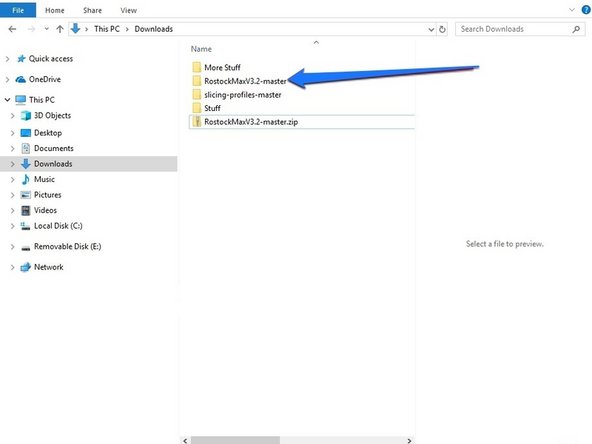
(pic with RED ARROWS) Locate the new firmware files you have downloaded in a previous step in this guide. They're usually located in your downloads folder.
-
Extract them from the zipped file. (Usually right click on the zipped download and choose extract)
-
(pic with BLUE ARROW) double click on the extracted folder. You may need to open another folder within this extracted folder to see the files.
-
-
-
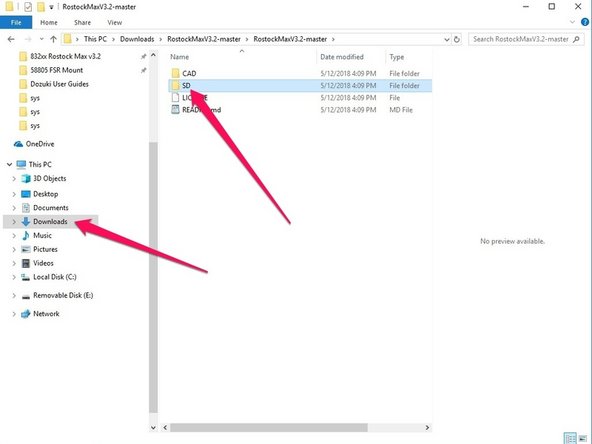
(RED ARROWS picture) There may be more than one SD card folder in the file download. For example, dual extrusion or WiFi, Ethernet or FSR probe or hotend probe, etc.
-
In the downloaded files, open the folder labeled SD for your machine model and features.
-
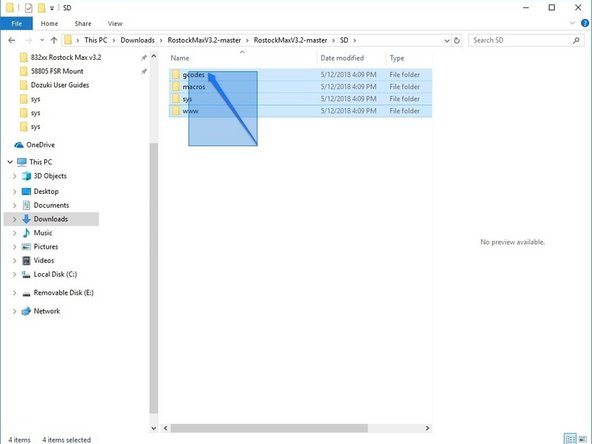
(BLUE ARROW picture) Select all folders. These four folders are the control files for the printer.
-
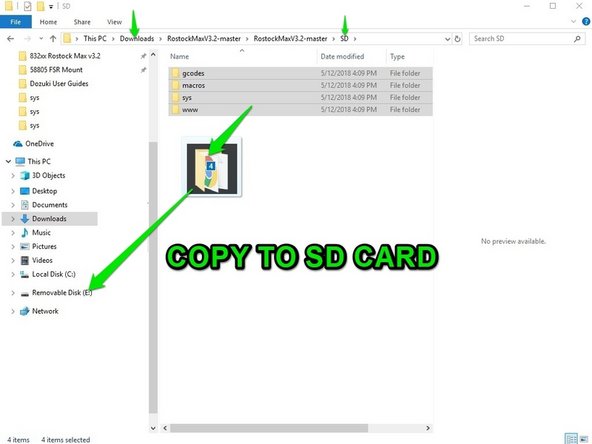
(GREEN ARROW picture) Copy all files to the micro SD card. In the photo, the micro SD card says "Removable Disk (E:)"
-
-
-
Remove the micro SD card from your computer
-
Reinstall the micro SD card back into the machine. Note that the SD card will push-in and latch into position.
-
-
-
If you are follow a machine build guide, please STOP HERE and return to the guide. >>> Otherwise continue this guide to reset or update your firmware.
-
Turn ON the printer and it should sign onto your network.
-
Pull up a browser window and try connecting. The WiFi module will usually be re-assigned the same IP address, however the IP address is not static (sorry no way to set static IP) and your router could assign another number.
-
Please visit our website page under menu item SUPPORT > Quick Start if you need to reconfigure your network connection.
-
-
-
1 Once connected, navigate to the g-code console. Ensure you tell the system to detect your SD card by typing the M21 command
-
2 Enter M997 S0:1 as shown in the pic. This command updates the firmware on the Duet control board. Be patient and do not power off the machine until finished.
-
3 Click Send and wait for a minute or two.
-
The DUET board "looks" for a .bin file (downloaded), compares it for new status and updates the firmware on the micro controller automatically. When finished, you will be able to connect with the browser as usual. The DUET firmware update will delete the .bin file from the micro SD card when it is finished updating.
-
-
-
In the web interface go to Settings at the bottom left, then select the System Editor tab.
-
Click on the config.g file and an editing box will pop up.
-
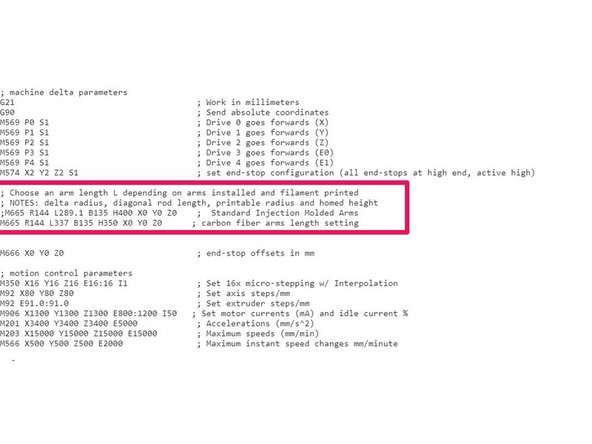
Find the area for choosing an arm length as shown in Pic 1.
-
There are 2 lines in the configuration, one for carbon fiber arms, one for injection molded arms.
-
The ACTIVE line is the one WITHOUT the semi-colon. The line with the semi-colon is NOT active. If your configuration is correct, leave it as is.
-
If the line for the arms you have does have the semi-colon at the beginning, you will remove the semi-colon, and add a semi-colon to the beginning of the line that is NOT for your arm configuration.
-
Click save at the bottom. The web interface should ask you if you would like to reboot. Choose yes. If it does not ask you after saving, shut the machine off for 30 seconds and turn it back on to load the correct settings.
-


Cancel: I did not complete this guide.
7 other people completed this guide.
One Comment
The rostockmax v3.2 is still not connecting to the wireless network? Any directions to where to go to solve the issue
Thanks in advance!
Vinamra Munot - Resolved on Release Reply