
-
-
Download Cura 4.6.2 but do not install. We will install Cura in a later in this guide using the file you download here. The links immediately begin a download of the proper files.
-
windows clicking here
-
mac clicking here
-
-
-
Download the SeeMeCNC 3MF Project File (download starts immediately when clicked). This will be used in a later step. These work with either win or mac computers. The BOSSdelta and Artemis slicing profiles are the same.
-
BOSSdelta 300 click here
-
Artemis click here
-
RostockMAX v3.2 or v4 click here
-
RostockMAX v1, v2, or v3 click here
-
Orion click here
-
BOSSdelta 500 click here
-
Optionally download ALL SeeMeCNC slicing profiles for Cura by clicking here (download begins immediately)
-
-
-
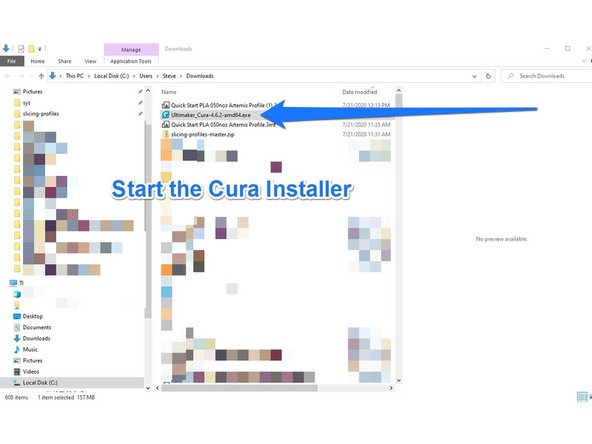
Start the Cura installer by using the installer file downloaded in Step 1 of this guide.
-
If prompted, say "Yes" to uninstall older versions. And then "Uninstall"
-
Choose "Next" until the "Choose Components" options appear. Add a check to the "3MF" files box.
-
Click "Finish" once Cura installation is complete.
-
After clicking Finish, Cura opens and asks "get started". The next step of this guide shows how to properly prepare Cura for SeeMeCNC delta printers.
-
-
-
When you initially open Cura, it will force you to set up a new printer from the beginning. We'll be using SeeMeCNC custom printer slicing profiles. So this initial configuration is not used for anything other than to get Cura past initial setup screens.
-
Select setup or "Get Started" when Cura prompts and agree (or disagree) to their User Agreement.
-
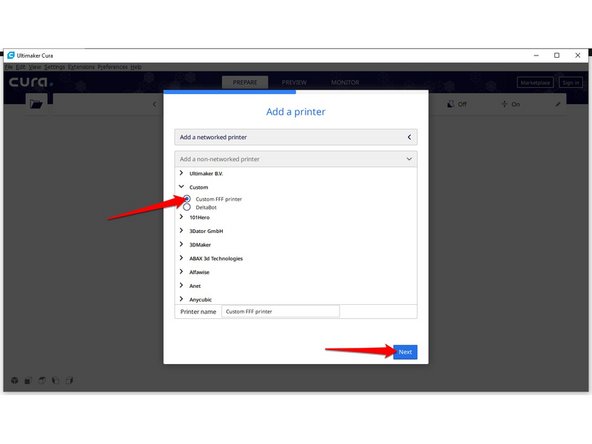
Select "Next" until you see the Add a printer window. Choose "Add a non-networked printer".
-
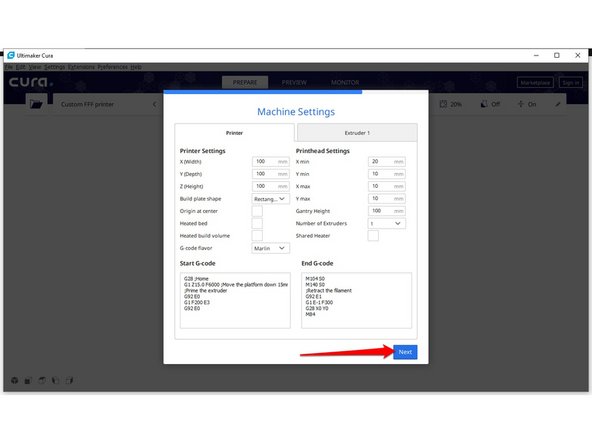
Ignore everything and just click select "Next" (you DO NOT use SeeMeCNC printers from this list)
-
-
-
Next we'll take you through the process of installing a SeeMeCNC custom 3MF project file. Our Quick Start 3MF project file will create the following:
-
a machine printer profile
-
sample STL model
-
SeeMeCNC custom slicing profile
-
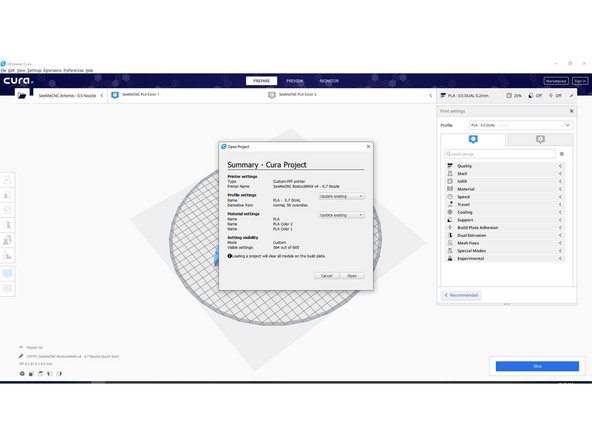
From the menu bar in Cura, select "File" then "Open File(s)..."
-
Open the file downloaded in STEP 2 "Quick Start PLA 050noz Artemis Profile.3mf" and select "Open as project"
-
Cura is now setup. The example is for dual PLA printing using a 0.5mm diameter nozzle (out standard).
-
You can slice good gcode files now! The following steps of this guide will help you build upon your new Cura installation. :)
-
-
-
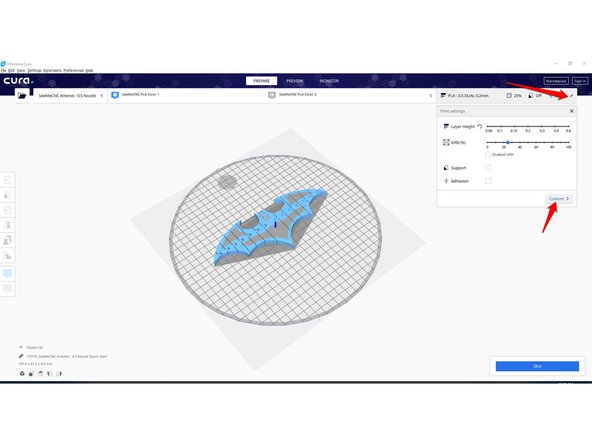
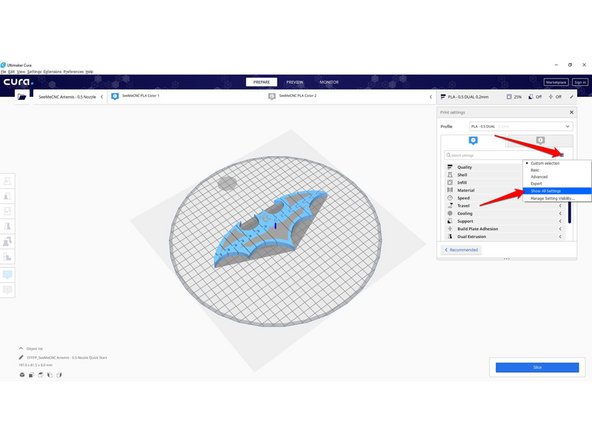
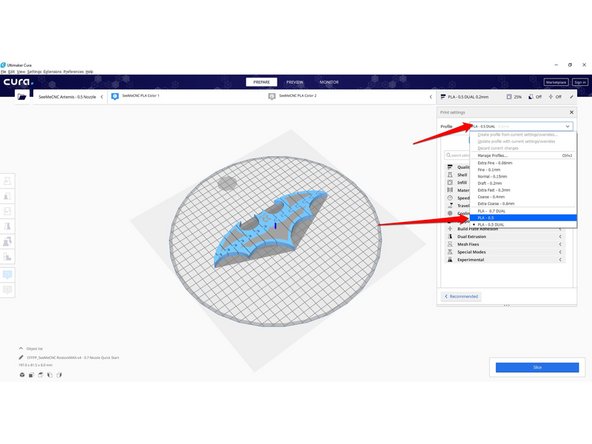
First thing's first, select the pencil in the slicing settings menu a the upper right hand corner and click "Custom". (first photo)
-
Next click the hamburger menu and select "Show All Settings". This will become useful later on as you get more familiar with 3D printing and slicing software. (second photo)
-
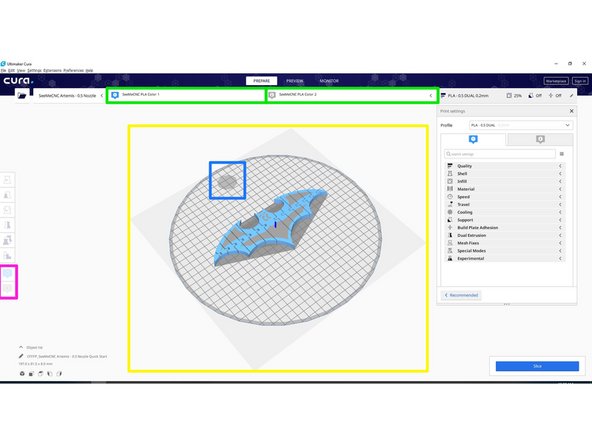
Now, let's go over some of what you see on the screen (refer to third photo):
-
At the top you'll see the two colors used to distinguish the two extruders for a dual extrusion machine. These are custom made material profiles that say PLA, but the material type and color in real life doesn't matter. This is just a tool in the software to show what parts will print with which extruder.
-
At the left is where you can change which extruder a part prints with. Simply select the part, then select the color associated with the extruder you want to print the part. Blue for Extruder 1, grey for Extruder 2.
-
Your main build area is represented in the center. Our Quick Start project files have our dual extrusion SeeMeCNC batarang file (edited from this file) pre-loaded, but you can easily delete these files and import whatever you want.
-
This circle "shadow" is indicating the approximate location and size of the purge tower that has to be used when printing in multiple materials. You'll see what it actually looks like when you slice your files and preview it.
-
-
-
In Step 2, we had you download ALL custom SeeMeCNC slicing profiles to your computer. (master.zip)
-
Locate and extract the downloaded files on your computer. These are the "slicing profiles master" zipped files.
-
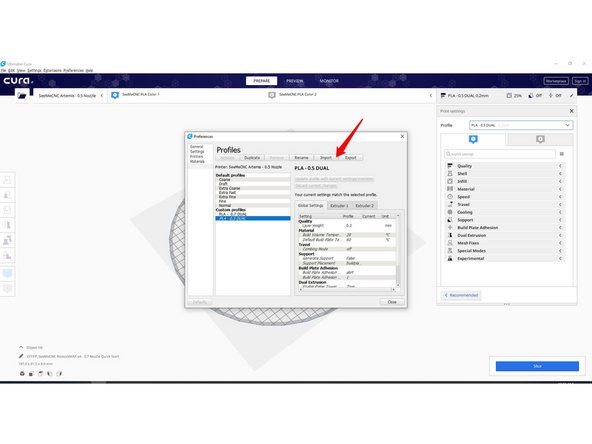
In Cura, select "Preferences" in the top menu bar, then "Configure Cura..."
-
A window opens, and on the left, select "Profiles". Below default profiles are custom profiles. (note: default profiles will not work)
-
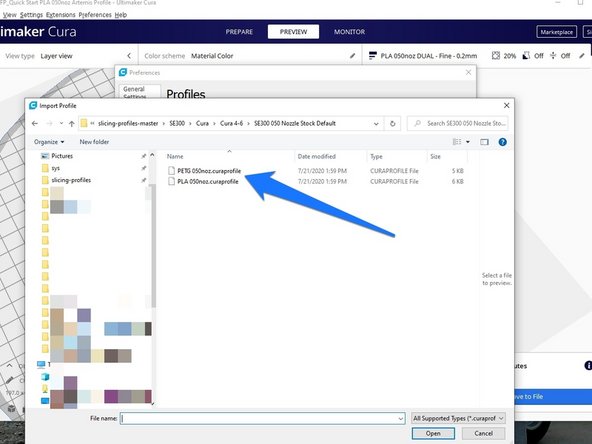
Select "Import" then navigate to the extracted slicing profiles folder. slicing-profiles-master > SE300 > Cura > any 4.6 or higher (see photo one)
-
Open a slicing profile. The slicing profiles have an extension type of ".curaprofile" and are catagorized by hotend type and nozzle size.
-
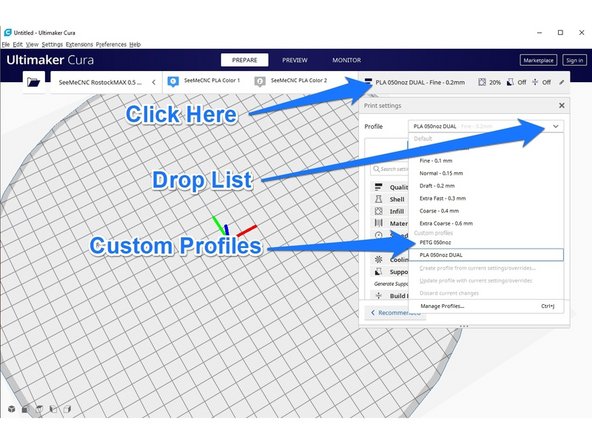
The new slicing profiles will now show up in the Print Setting list in Cura under the Profile drop list. (see second photo)
-
-
-
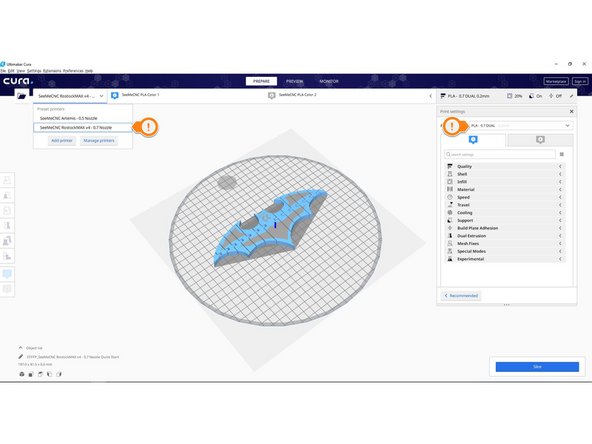
If you have multiple nozzle sizes or multiple printers, it will be easiest to install separate machine profiles for each printer. Let's install a RostockMAX single extruder profile.
-
Click here to download the RostockMAX 3MF file we'll use here. (download begins immediately)
-
Just like before, select "File" and "Open File(s)..."
-
Navigate to the folder containing the Quick Start .3mf project file for your desired nozzle size and printer type, and click "Open" and "Open as project"
-
If the shown dialogue box appears, make sure all the drop down menu options are set to "Update Existing", and click "Open"
-
When the project opens, you'll see the second machine has been added to your list of machines in the upper left, and a new slicing profile has been automatically imported on the right.
-
-
-
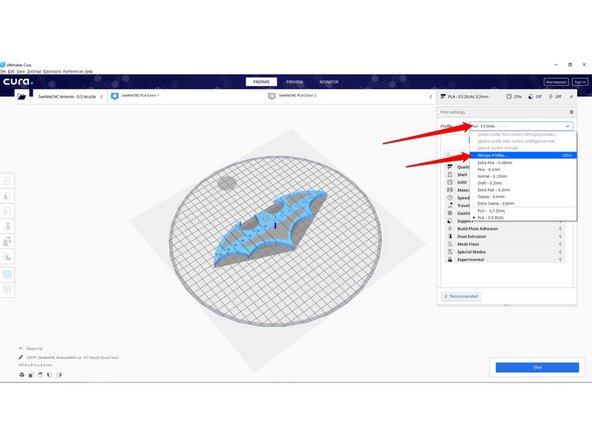
If you have a machine with a single extruder or you're printing with different materials, you'll want to install a different slicing profile for your printer.
-
Open the slicing profiles drop down menu and select "Manage Profiles"
-
In the slicing profiles menu, select "Import"
-
Navigate to the folder labeled with the nozzle size you are using in the slicing profiles master folder you extracted earlier.
-
Select the material profile you want and click "Open", then close the pup-up stating the import was successful and close the slicing profiles menu.
-
You should now see the new material slicing profile available in the slicing profiles drop down menu!
-
Note: When using single extrusion profiles, both extruder colors and settings will still be visible in the interface. This is perfectly fine. Just make sure all models are set to color Blue for Extruder 1 before slicing!
-
-
-
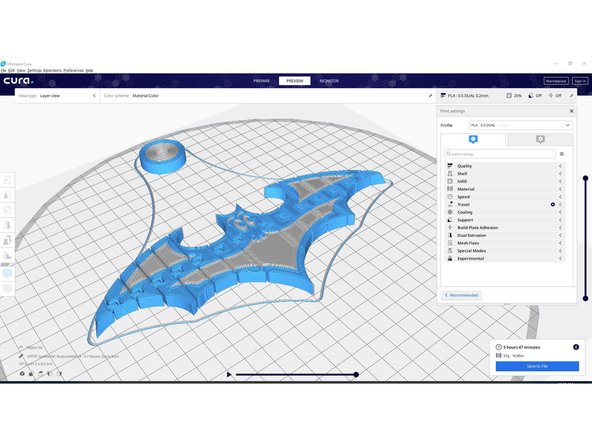
Just slice and print. Don't change a thing. Drop an STL into Cura and click "Slice", "Preview" to preview the sliced file, then "Save to File".
-
Cura expert mode has about a zillion combinations of choices, so it's tricky no matter how good your are. We've invested some time to make general purpose profiles to slice most parts. Try them before adjusting anything.
-
Standards for SeeMeCNC Delta's for Cura 4-2-1 and higher, single or dual extrusion:
-
Filament starts 160mm above nozzle
-
Bed probe using the "Probe Autolevel" macro we wrote
-
Probe with hotend room temp and bed hot
-
Only turn on or off the "Generate Supports" check box under "Support" when getting started
-


Cancel: I did not complete this guide.
6 other people completed this guide.
9 Comments
Is the 3MF Project File for the Artemis and the BOSSdelta 300 supposed to be the same file? When I click the BOSSdelta 300 “click here” button for the printing profile, the file that I receive is titled “Quick Start PLA 050noz Artemis Profile.3mf”. Is there supposed to be a separate one for the BOSSdelta 300?
Yes. The primary difference is the build height. The BOSSdelta 300 is a little less than the Artemis 300.
SeeMeCNC -
I have the same question. I know you can make a custom profile in Simplify3D but I’m not sure what the baud rate and the firmware are for the BOSSdelta 300 & 500.
Dillon Woodland - Resolved on Release Reply