
-
-
Remove the white plastic springs. Stretching one side at a time to release the ball on the spring. Set aside.
-
-
-
Pull each ball joint, unsnapping the arm from the ball studs.
-
Save arms just in case you need to return to a stock configuration.
-
-
-
Snap all six new carbon fiber arms.
-
Install the six white plastic ball springs.
-
-
-
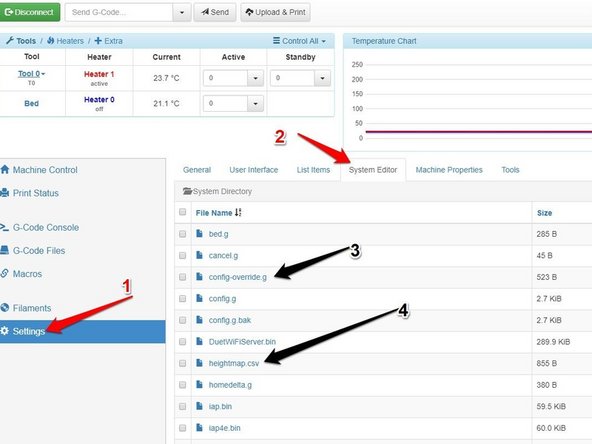
Connect to the printer and navigate to Settings>System Editor
-
Delete the following files:
-
config-override.g
-
heightmap.csv
-
-
-
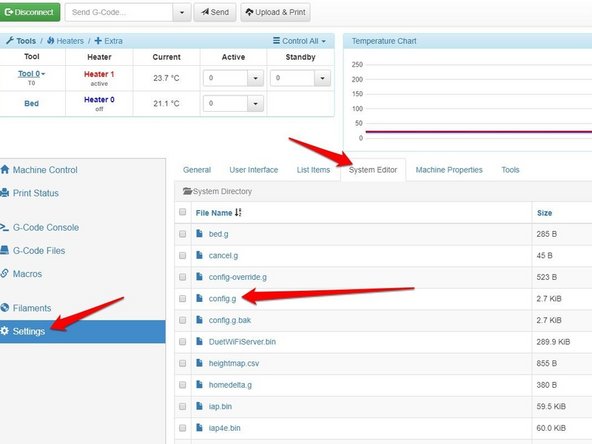
Settings>System Editor
-
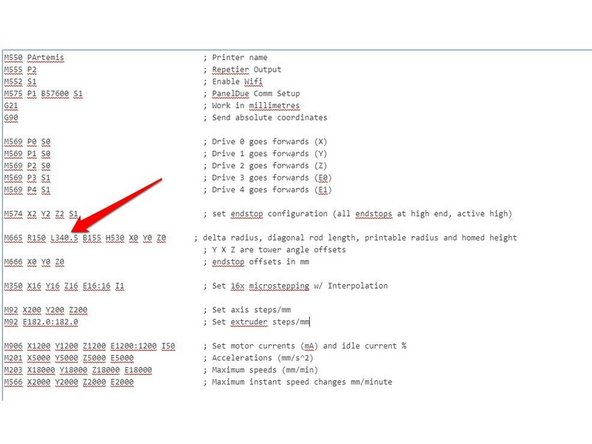
Edit config.g - locate line M665, usually about 10 or 12 lines down.
-
Artemis 300 set L to 340.5 (L340.5)
-
RostockMAX v3.2 AND v4 machines set L to 340.5 and H to 350.
-
If you do not change the H value, the machine will crash into the glass before being able to probe. The carbon fiber arms are longer than stock arms, shortening the max Z length.
-
The arm length value is a starting point. Although the arms are made in a precision jig, there may be variances and this value may need to be slightly adjusted if you are looking to print parts with specific size values. Adjusting and re-calibrating may be needed to tweak the final print size output.
-
-
-
Save and reset, reboot, or power cycle the printer
-
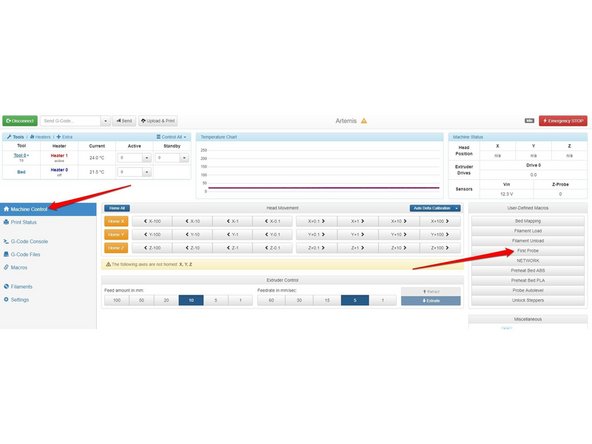
Prepare for probing by clearing the nozzle and print bed as usual
-
Click the macro 'First Probe'
-
Wait for completion.
-
-
-
Remember DO NOT use the button labeled "Auto Delta Calibration" Instead we use the macros we wrote.
-
Remember NEVER use software auto leveling in any slicing software. Auto leveling and calibration is performed by the firmware on ALL SeeMeCNC 3D printers.
-
Remember when cleaning glass or changing a nozzle to use "Probe Autolevel" calibration macro.
-
The "Probe Autolevel" macro calibrate your printer using SeeMeCNC developed g-code.
-
Cancel: I did not complete this guide.
2 other people completed this guide.