-
-
Download the SeeMeCNC generated factory file. The Simplify3D factory file saves the machine, slice settings, and STL all in one file.
-
Click this link to download the factory file https://github.com/seemecnc/slicing-prof...
-
In the SeeMeCNC github file repository, right clicking (Windows) on the file gives options to save the file.
-
-
-
In Simplify3D, open the factory file. (Top left select File > Open
-
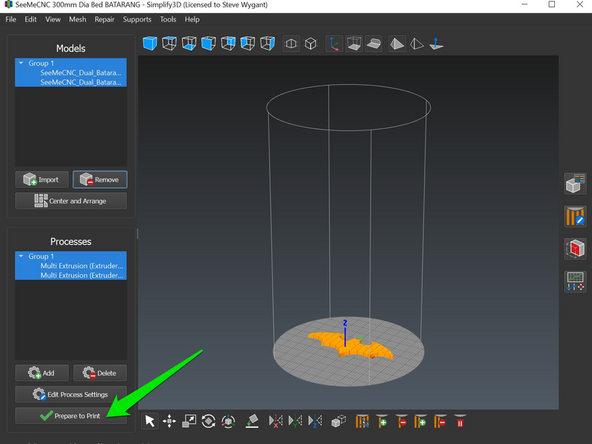
Select "prepare to print" (bottom left).
-
Save the gcode (bottom left) and send to the printer.
-
-
-
Click "Prepare to Print" on the lower left
-
Note that multi-color prints have both models arranged on the print bed. Then in the menu bar, choose "Tools > Multi Extrusion Wizard". In this example, this has already been done in the example file downloaded.
-
-
-
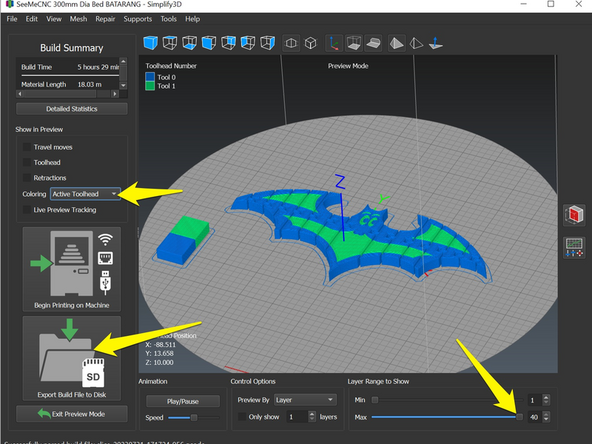
The slider along the bottom is used to inspect the layers of the print.
-
Save the gcode file by clicking on the button on the lower left "Export Build File to Disk"
-
The model is now ready to print.
-
Note: The view of the multi-color print can be changed by selecting the "coloring" drop down located on the left side near the middle. The software only allows automatic coloring.
-
Remember if changes are made to the "Process Settings, save them by clicking "Update Profile" by the Profile Name.
-
Almost done!
Finish Line


