Tools
Parts
No parts specified.
-
-
First, click here to read safety information . This safety information may be updated at anytime so occasionally check for updates.
-
NOTE: This guide is intended to be followed online in order to fully utilize the links and documentation found within.
-
-
-
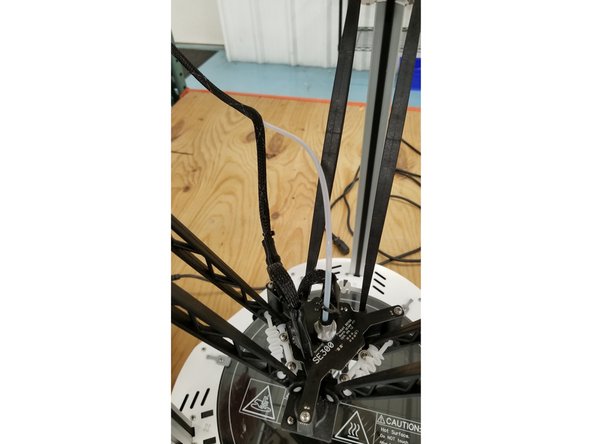
This is a lot easier to do if you unplug the 10-pin SL connector from the front of the hotend, and remove your PTFE tube from the PTC fitting. Both are indicated by the red arrows in the picture.
-
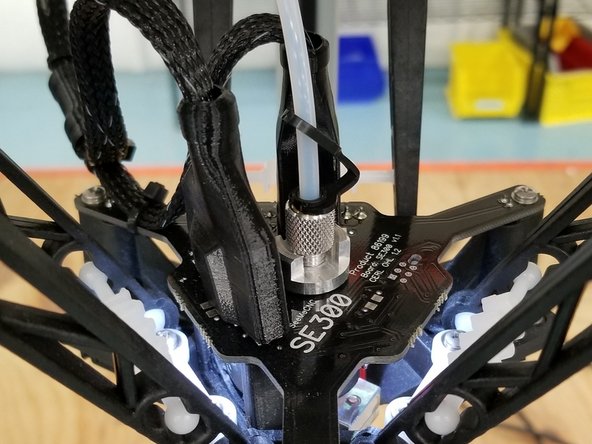
Carefully pull the power/thermistor splitoff down towards the arm of the hotend board and zip tie in place as indicated in the photo.
-
Make sure your cables are still plugged in properly under the flexible boot. If the bend is too tight, you might need to carefully snip a little of the boot off to give yourself some more room to bend the wires in place.
-
-
-
It's recommended to pull the PTFE tube back and exit it from the mesh loom further up the whip after performing this change.
-
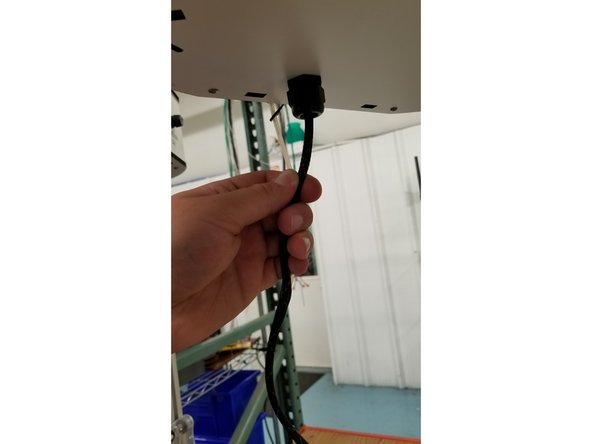
You will also need to pull more of the whip out of the exit location on the machine.
-
On the RostockMAX V3.2 carefully pulling the whip a few extra inches through the black housing will work just fine.
-
On the Artemis you may not need to pull extra whip length out. If you do, you can rotate your extruder assembly up and carefully pull some extra whip length out of the tower. Don't force it. If it's not coming out with a decent gentle tug, leave it and contact us to get a replacement whip of the current revision.
-
-
-
You're done! You now have no more strain on your two pin phoenix connector!
-