Difficulty
Moderate
Steps
4
Time Required
- Configuring the Rostock Max v3.2 4 steps

In Progress
This guide is currently being written. Reload periodically to see the latest changes.

Private
This guide will not appear in search results and can only be viewed by team members!
Quiz
0
-
-
If you are running windows, click here to download the Duet Wifi Drivers. If you are running Mac or Linux, you won't need them - skip this step. Unzip the file and save the drivers somewhere you'll be able to find them. On windows 10, just double click the "duet.inf" file and in will install the driver. On windows 7, you'll need to find the duet in Device Manager and click update driver.
-
If you don't already have a program installed to send commands to a 3D printer, we recommend YAT (Download here: https://sourceforge.net/projects/y-a-ter...). Once it's downloaded you shouldn't need to change any settings, just connect to the printer.
-
If you are using Simplify 3D, Pronterface, or MatterControl to connect to the printer, make sure it's not converting all your text to uppercase when you're setting up your wifi in the next step.
-
You can find more information on the Duet wiki. All of the Rostock Max V3.2's are currently shipped with 1.19 firmware. https://duet3d.com/wiki/Getting_connecte...
-
-
-
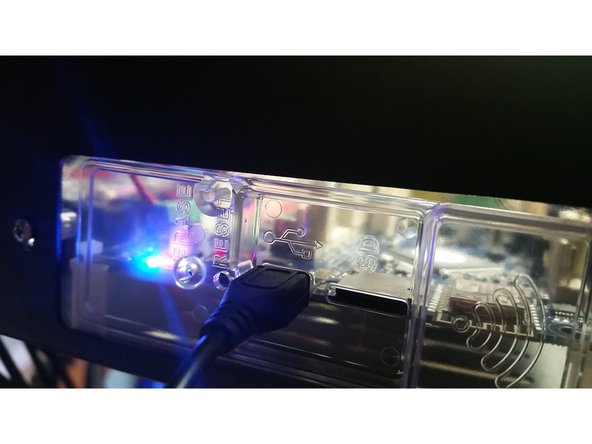
Plug the micro USB cable into the USB slot on the (top) middle of your printer.
-
Connect to the printer with YAT, S3D, MatterControl, or carrier pidgeon. Note that you'll need to set the baud rate to 115200 in order to connect. Carrier pigeon baud rates vary by vendor.
-
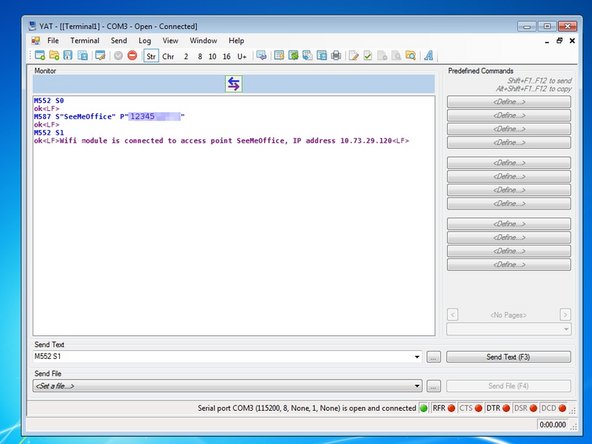
Send the following Gcode to the printer: M552 S0 Then send: M587 S"your-network-ssid" P"your-network-password"
-
Send: M552 S1 and after a few seconds, you should see a confirmation that you're connected, along with the IP address of your printer. Write the IP address down, you'll use it in the next steps
-
Make sure your printer is close to your Wifi Router. If you a getting a lot of AJAX disconnected errors, it's probably because the printer can't talk to your wifi reliably. Keep the distance between them to a minimum.
-
The SD card can become partially unseated in shipping. It is highly recommended to remove it (push it in until you hear the click, then it'll come out) and put it back in (push until you hear the click) before you get too far into the setup.
-
-
-
Check that your hot end probe is working properly. Tap upwards on the bottom of the nozzle and you should see a blue LED flash on the hot end. If you don't check your whip and probe wiring. If your wiring looks correct, contact support.
-
Open a web browser (we recommend Chrome) and download the newest config files here: https://github.com/seemecnc/RostockMaxV3...
-
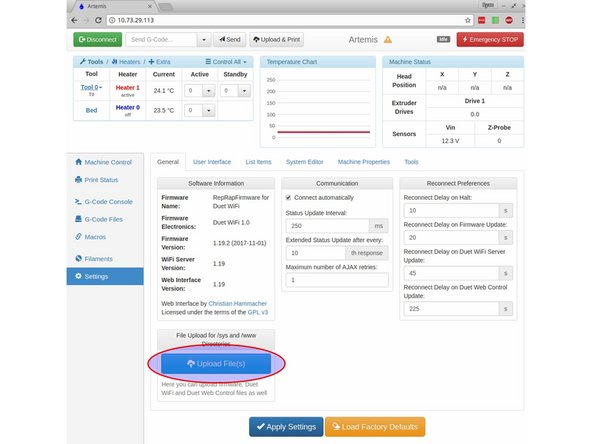
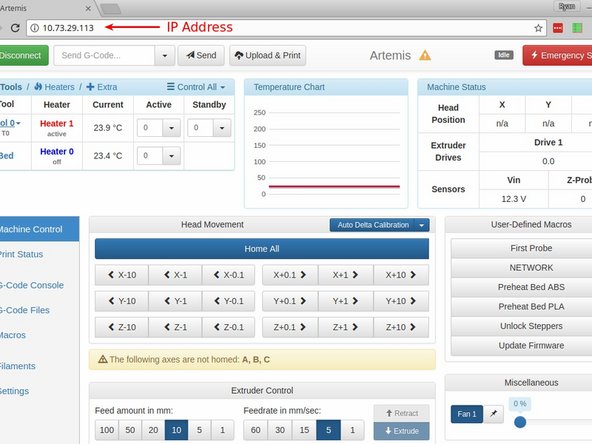
Open a new tab and enter the IP Address of your printer. When the page loads, click on "Settings" in the lower left of the screen. Click on the "Upload Files" button, and upload the config.zip file that you just downloaded.
-
Once it's uploaded, you will be prompted to reboot the Duet. Click yes. After about 10 seconds, click the Refresh button on your browser and your printer will be running with the new config files.
-
-
-
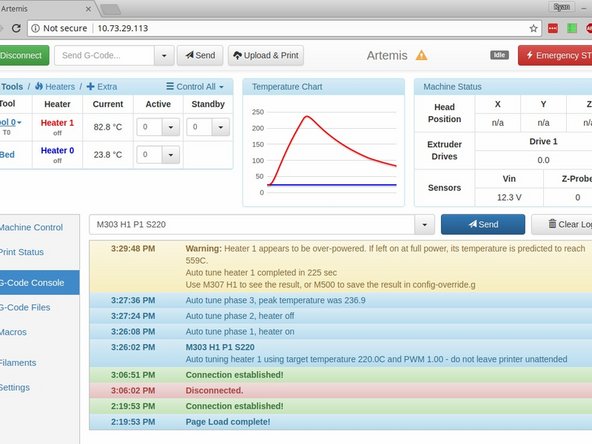
Next we're going to tune your printer for the highest temperature you commonly print at. To tune the hot end heater, click on "G-Code Console" on the left, then where it says "Send G-Code", enter: M303 H1 P0.8 S230 (Change 230 to the hot end temperature you want to tune for) and click "Send"
-
The heater will go in to tuning mode and will come up to temperature and then back down to room temperature to tweak the heater settings
-
Don't PID tune for higher than 270 degrees as it will overshoot the maximum allowable temperature - this will still allow you to print at 280 degrees.
-
You might get a warning about the heater being overpowered. You can safely ignore this.
-