-
-
If you are not using a MAC, proceed to the next step.
-
Mac OSX Users: Open Applications > Utilities > Terminal .
-
Run ls /dev/tty.*
-
Copy the result that has USB in the name. For example; /dev/tty.usbmodem1411
-
Run screen /dev/tty.usbmodem1411 115200. Replace "usbmodem1411" with the result you received. You should see a blank screen. Hit enter and you should see OK returned. You are connected successfully.
-
If you get an error, Sorry, could not find a PTY. unplug the USB, plug it back in and try again.
-
-
-
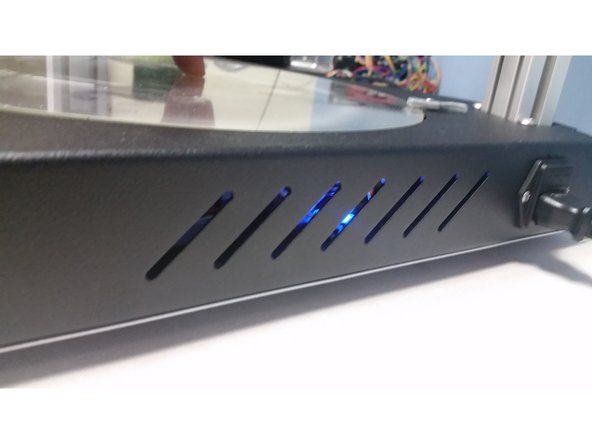
Older machines had FSR sensors. Current models use the SE300 Strain Gauge.
-
If you have an older FSR machine, check that your FSR's are working properly. You should see a blue light through the slots in the side of the base with the power cord. Push down on the bed in a few different places and make sure the lights flash/blink - you shouldn't need to push very hard. If they don't blink, contact support.
-
Open a web browser and download the newest config files by clicking "Clone or download" and select download here: https://github.com/seemecnc/Artemis
-
Extract the zip file to a location on your computer.
-
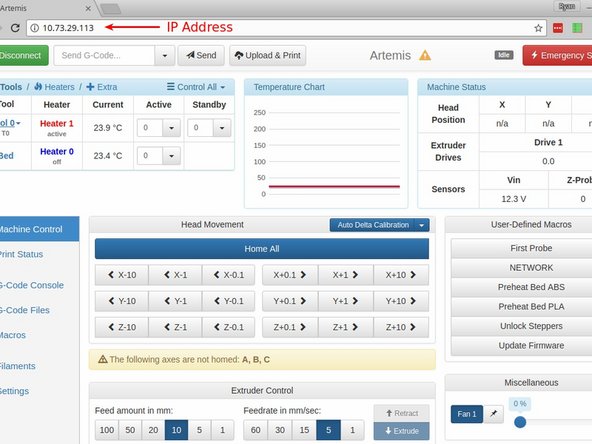
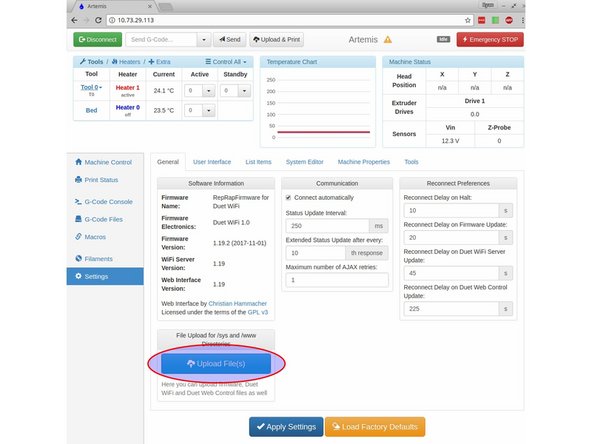
Open a new tab and enter the IP Address of your printer. When the page loads, click on "Settings" in the lower left of the screen. Click on the "Upload Files" button, and upload the Duet2CombinedFirmware.bin file that you just downloaded. It is located in the folder for your machine (FSR or Hotend probe folder) followed by the /sys/ folder.
-
Once it's uploaded, you will be prompted to reboot the Duet. Click yes. After about 10 seconds, click the Refresh button on your browser and your printer will be running with the new config files.
-
-
-
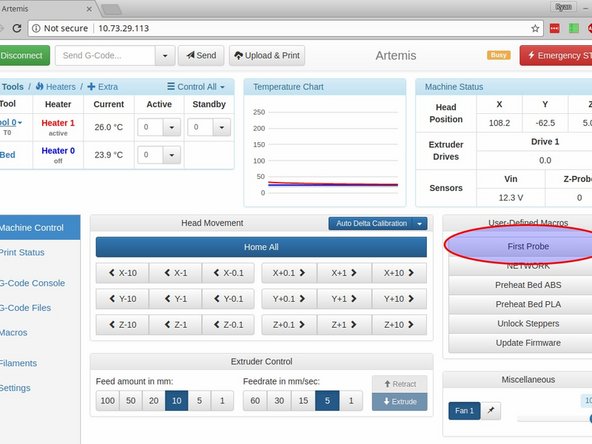
We have setup a custom macro to take care of all the heavy lifting for your first calibration. On the "Machine Control" tab, you can click "First Probe" under "User-Defined Macros" to do your first calibration.
-
The macro will do an initial calibration that starts extra high off the bed to account for slight variances in build height. Once it's completed, it will do a bed mapping to further dial in the calibration.
-
Please note that if you do any other calibration after the bed mapping such as running the Probe Autolevel macro, it will cancel out the bed mapping. We suggest running bed mapping as the final calibration to get the the best results.
-
Do not run any of the calibration probing with the hotend up to temperature or with the hotend above room temperature. This can cause probing errors.
-
You might see a line or two that says the Height Error Difference was above the maximum tolerance. Don't worry about them unless you see a lot of them.
-
-
-
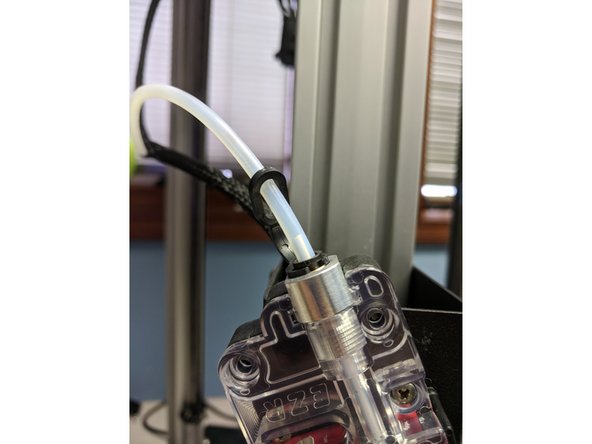
You can load filament by heating the hot end up to 220 degrees and manually feeding the filament in through the EZR and Bowden tube, or by using the "Filament Load" macro
-
To use the load filament macro, hold in the red button on the EZR extruder and press the filament in until it is just peeking out the side with the Bowden tube. Then click "Filament Load" under User-Defined Macros, and click OK.
-
-
-
-
-
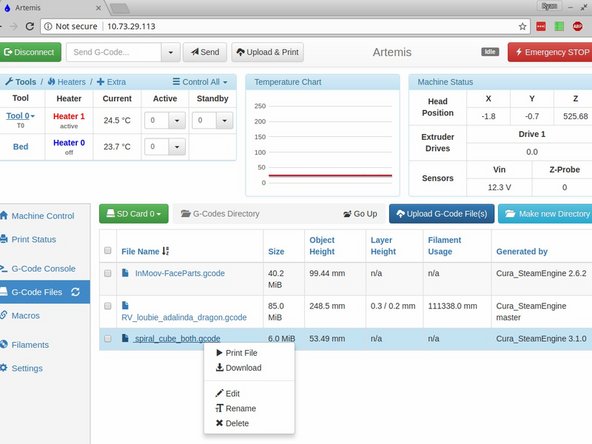
Upload and print your first gcode file. You can do this two different ways. You can either click "Upload & Print" at the top of the page, or click on G-Code files at the side of the page, then "Upload G-Code File(s)", then select your file from the list.
-
If you'd like a pre-sliced file for your first print, FIRST PRINT
-
NOTE: On the first heatup of your bed, you may notice a small amount of smoke from the bed / base of the printer. This is nothing to worry about, this is excess residue on the silicone bed from the manufacturing process. We cycle every bed at SeeMeCNC before shipping to reduce / eliminate this issue, but some are more determined than others.
-
-
-
We recommend using Cura for slicing. All v3.2 testing is performed with Cura and our slicing profiles for our printers will get you going fast! Click here to see our guide for installing Cura and downloading our profiles for your new printer.
-